Using Git Assistant AI Feature in IntelliJ Plugin to Generate Commit Messages
Git Assistant is a powerful IntelliJ IDEA plugin that allows you to use its AI capabilities by configuring your own OpenAI key. In this article, we will explain how to use the AI feature in the Git Assistant plugin to generate commit messages.
Installing the Git Assistant Plugin
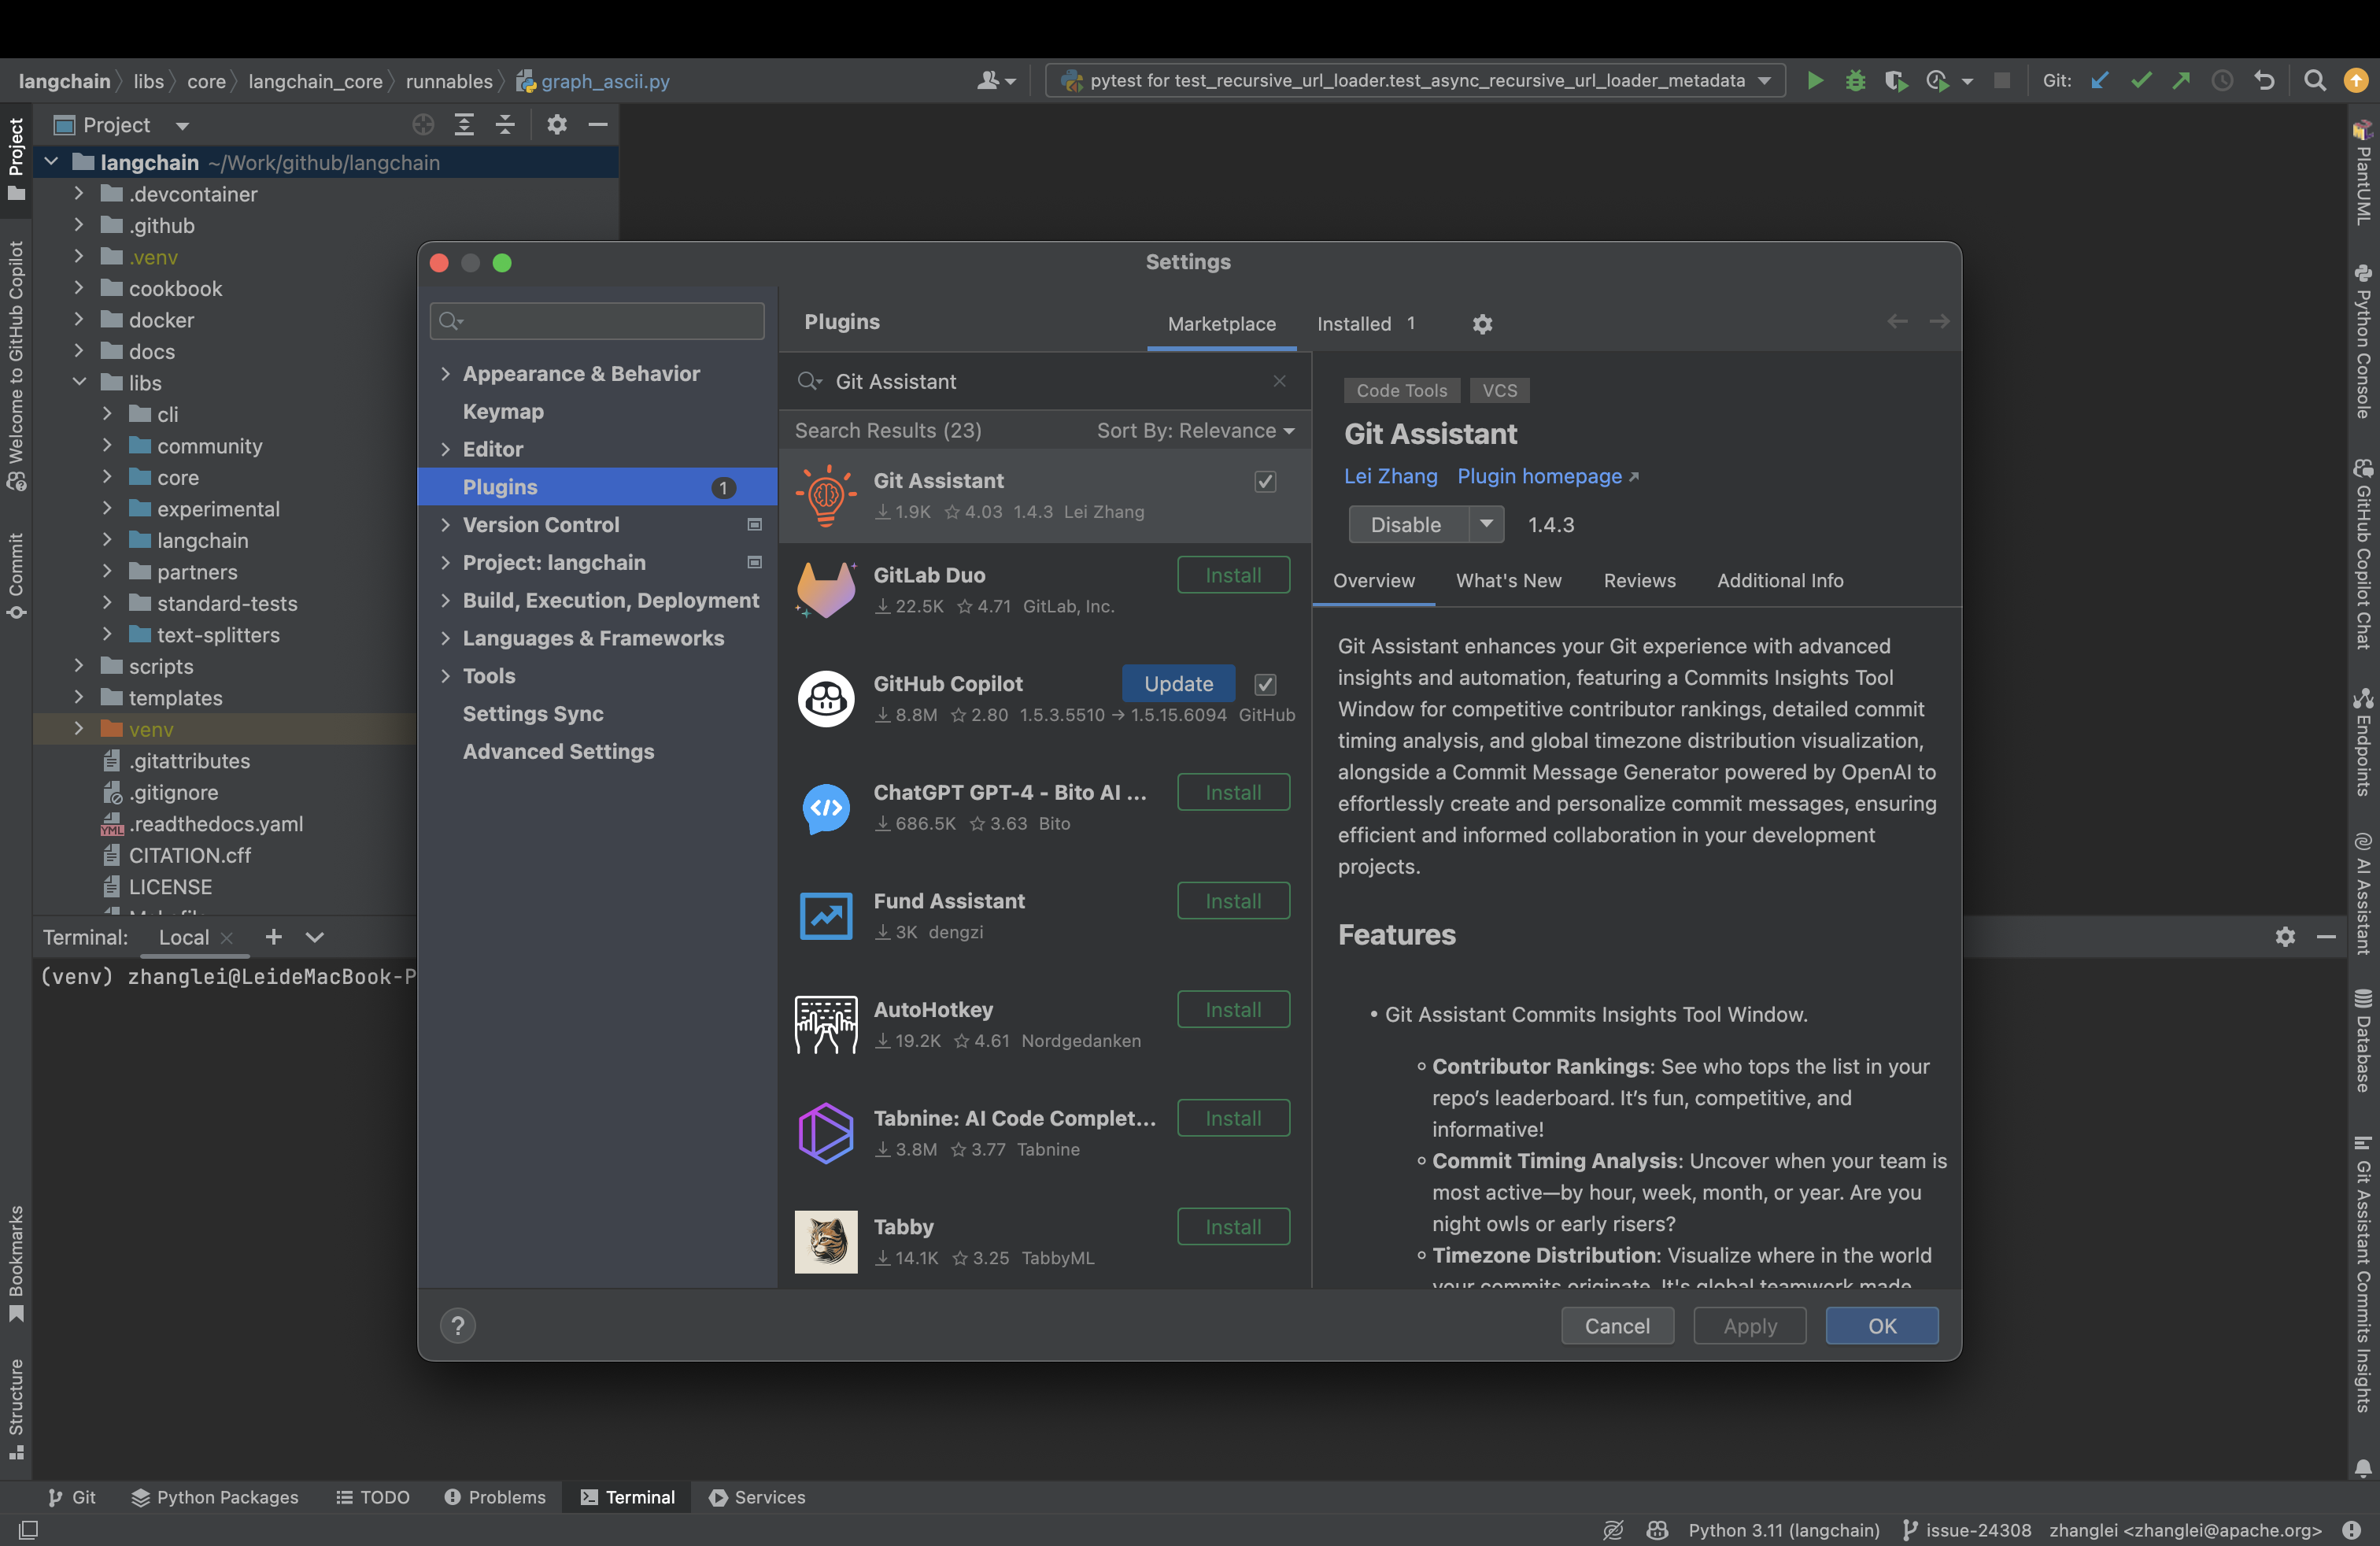
First, you need to install the Git Assistant plugin in IntelliJ IDEA. You can search for “Git Assistant” in the IntelliJ IDEA plugin marketplace and install it.
Configuring the Git Assistant Plugin
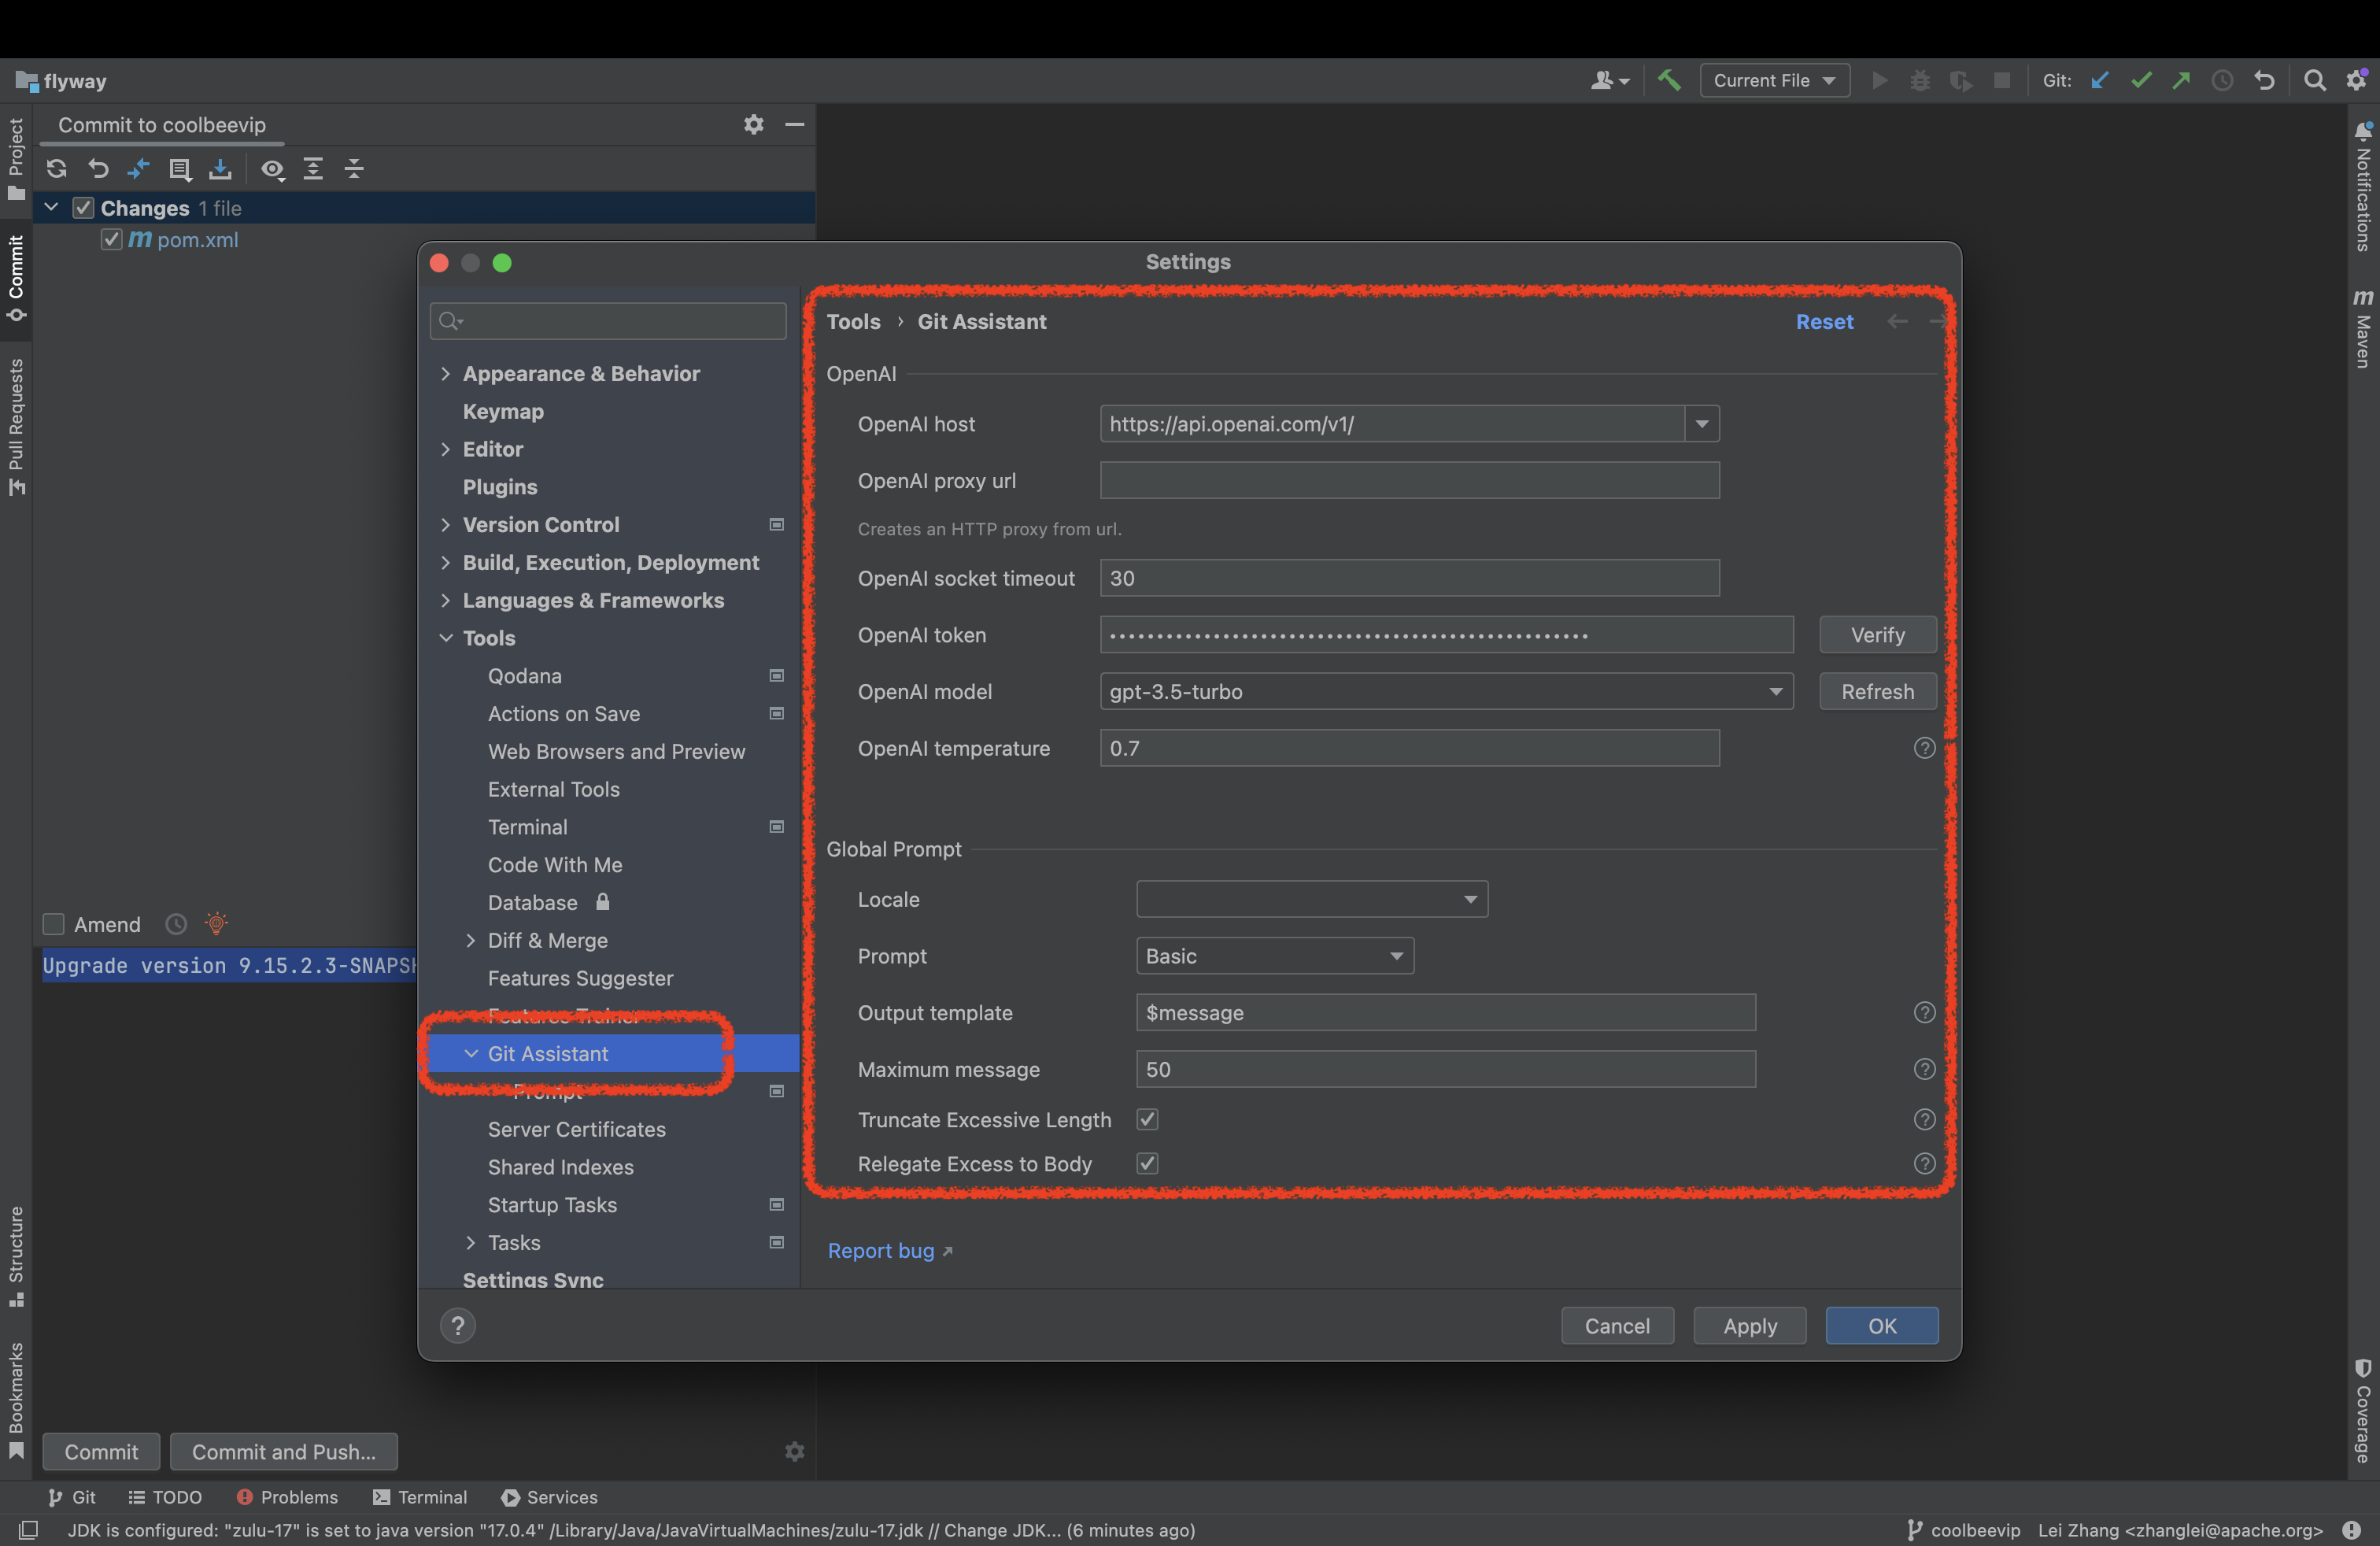
After installing the Git Assistant plugin, open Settings -> Plugins -> Tools -> Git Assistant to see the following configuration interface.
OpenAI Configuration
Here, you can configure your OpenAI API host and OpenAI API key. Click the Verify button to validate your configuration. Click the Refresh button to update the list of available models. Finally, click the Apply button to save your configuration.
Global Prompt Configuration
You can configure the project parameters here to control the content of the generated commit message.
- Locale: Language environment
- Prompt: Basic and Conventional Commits modes
- Output template: In the Basic mode, you can define the format of the generated commit message using a template with the $message and $branch variables.
- Commit subject limit: Length limit of the generated commit message
- Truncate excessive length: Whether to truncate the information generated by the large model if it exceeds the Commit subject limit
- Relegate excess to body: Whether to include the excess information in the body if it exceeds the Commit subject limit
Note: The Global Prompt configuration is global, meaning it will be used in all projects. If you want to configure it separately for a specific project, you can do so in Settings -> Plugins -> Tools -> Git Assistant -> Prompt.
Using the AI Feature to Generate Commit Messages
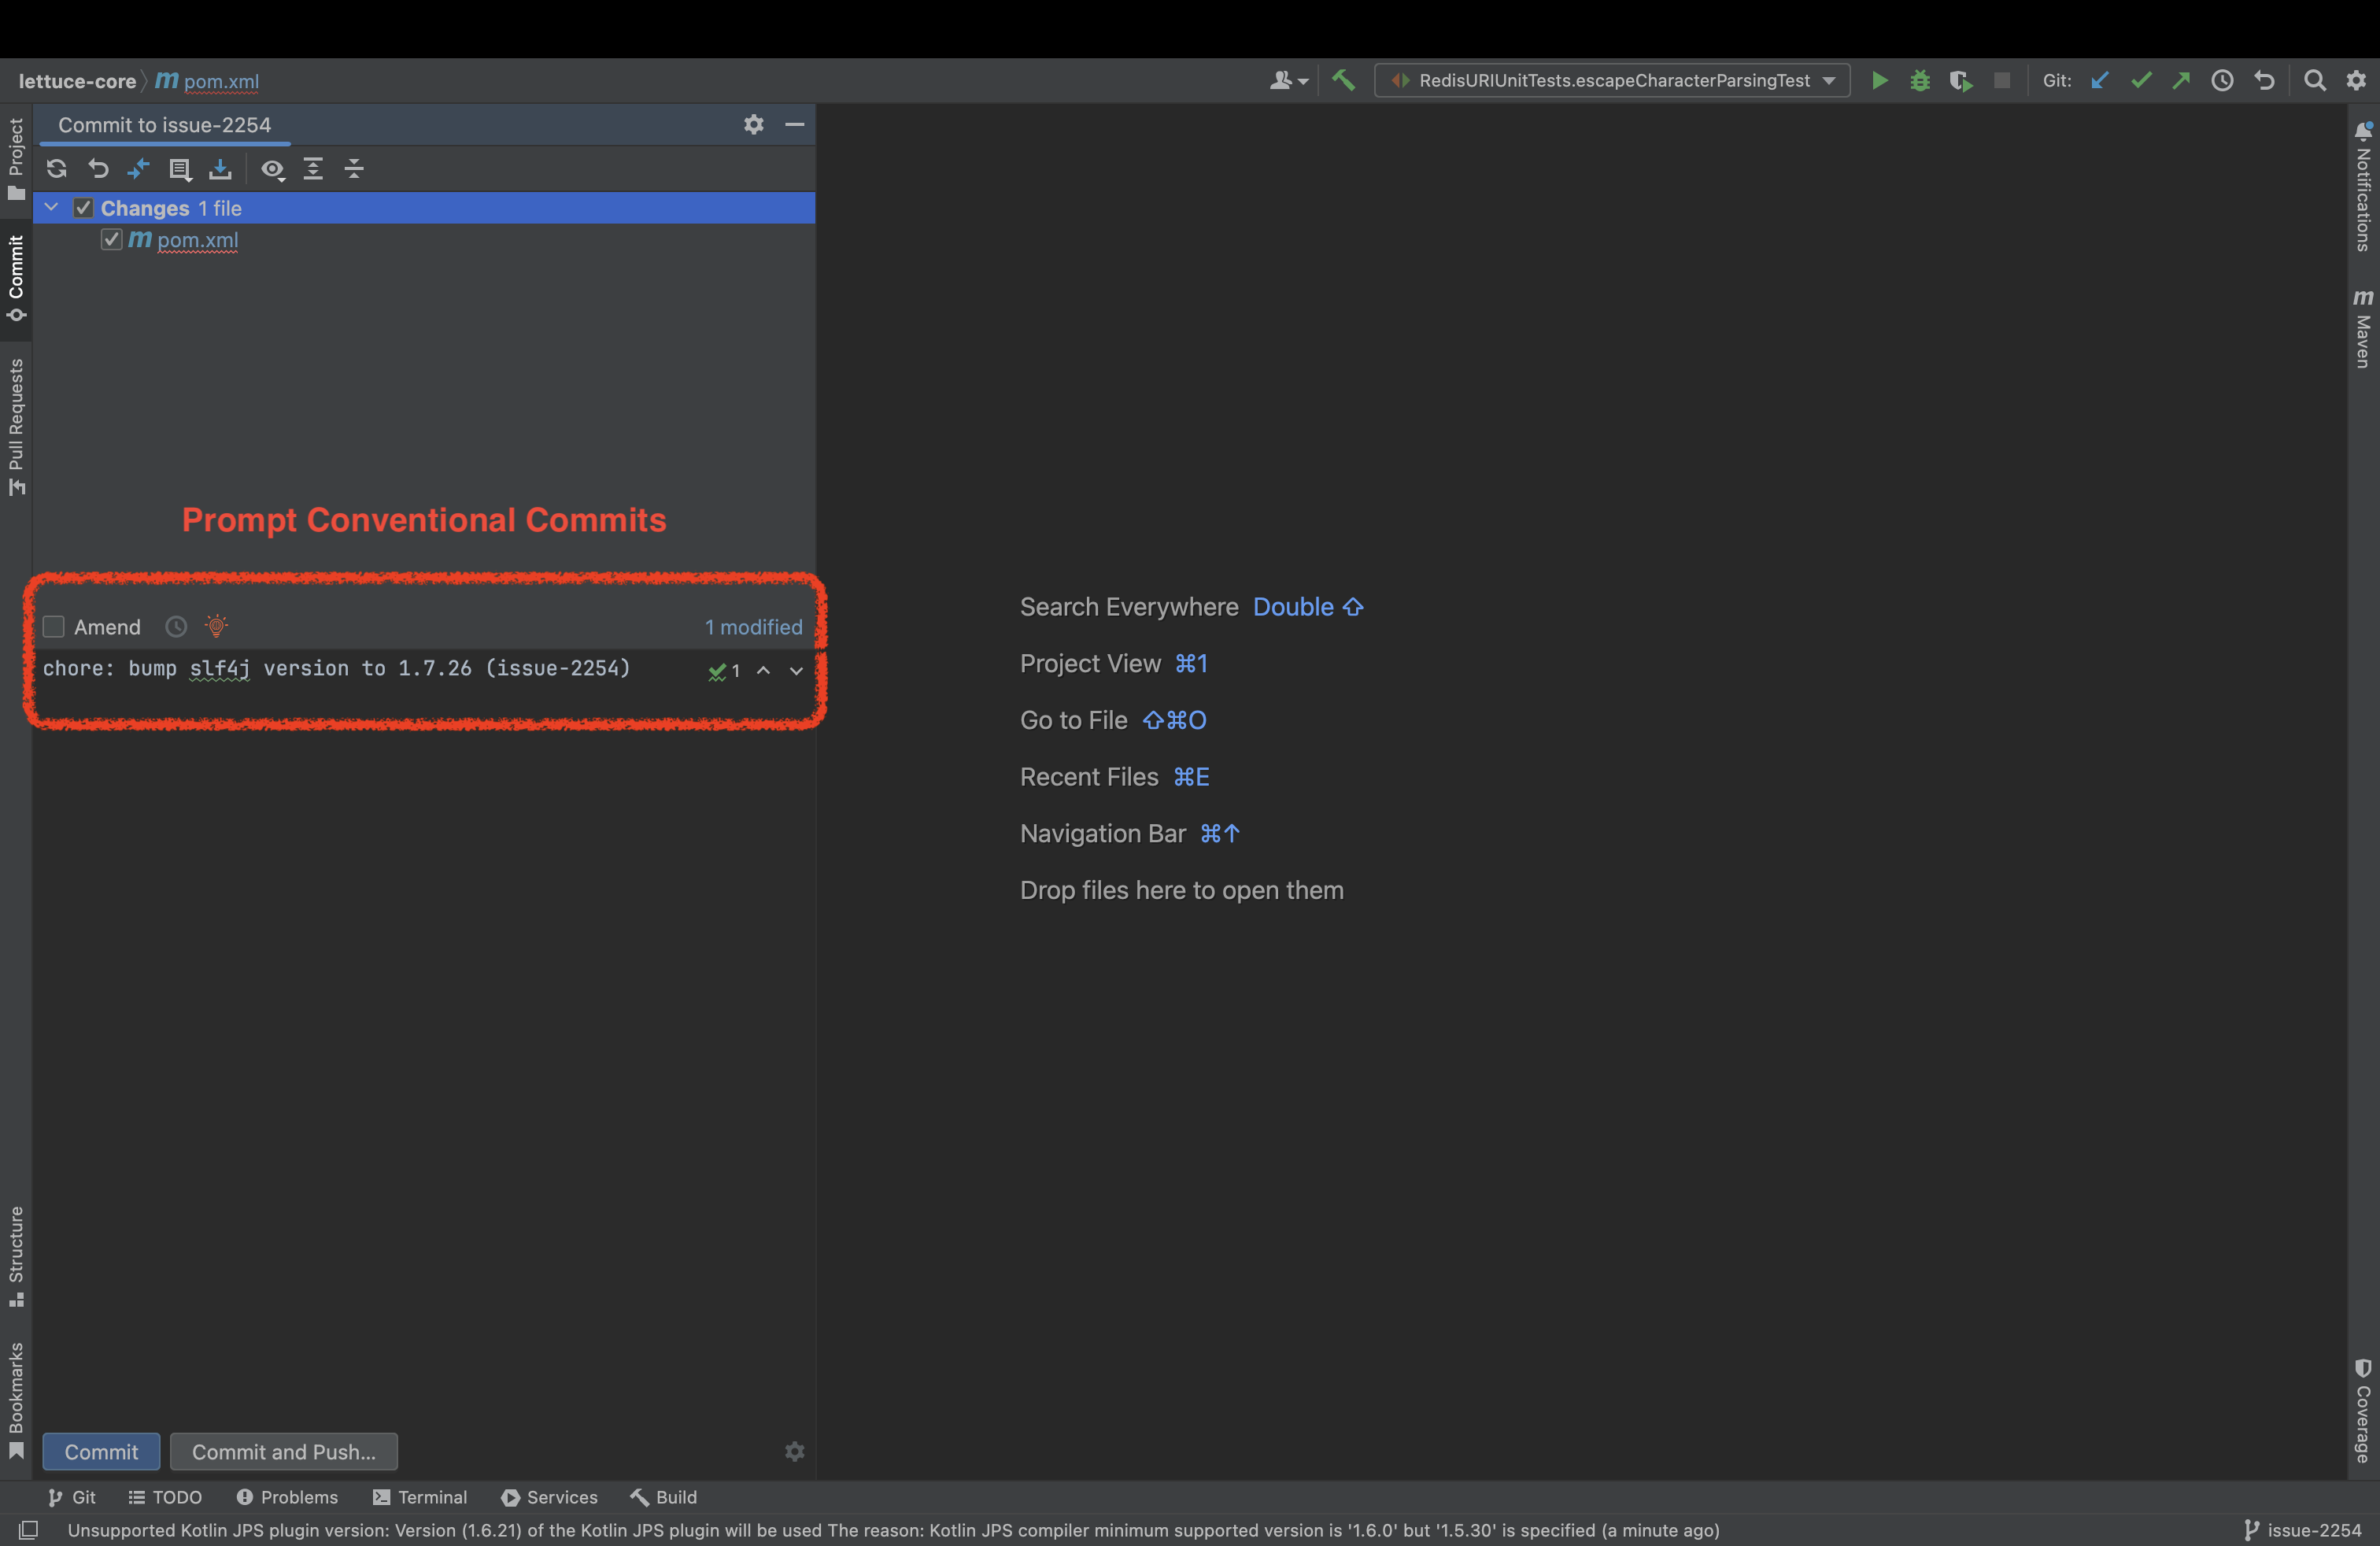
After completing the configuration, you will see a 💡 button in the left Commit panel. Click it to generate the commit message.
Commit message generated using the Conventional Commits mode:
Commit message generated using the Basic and Output template modes:
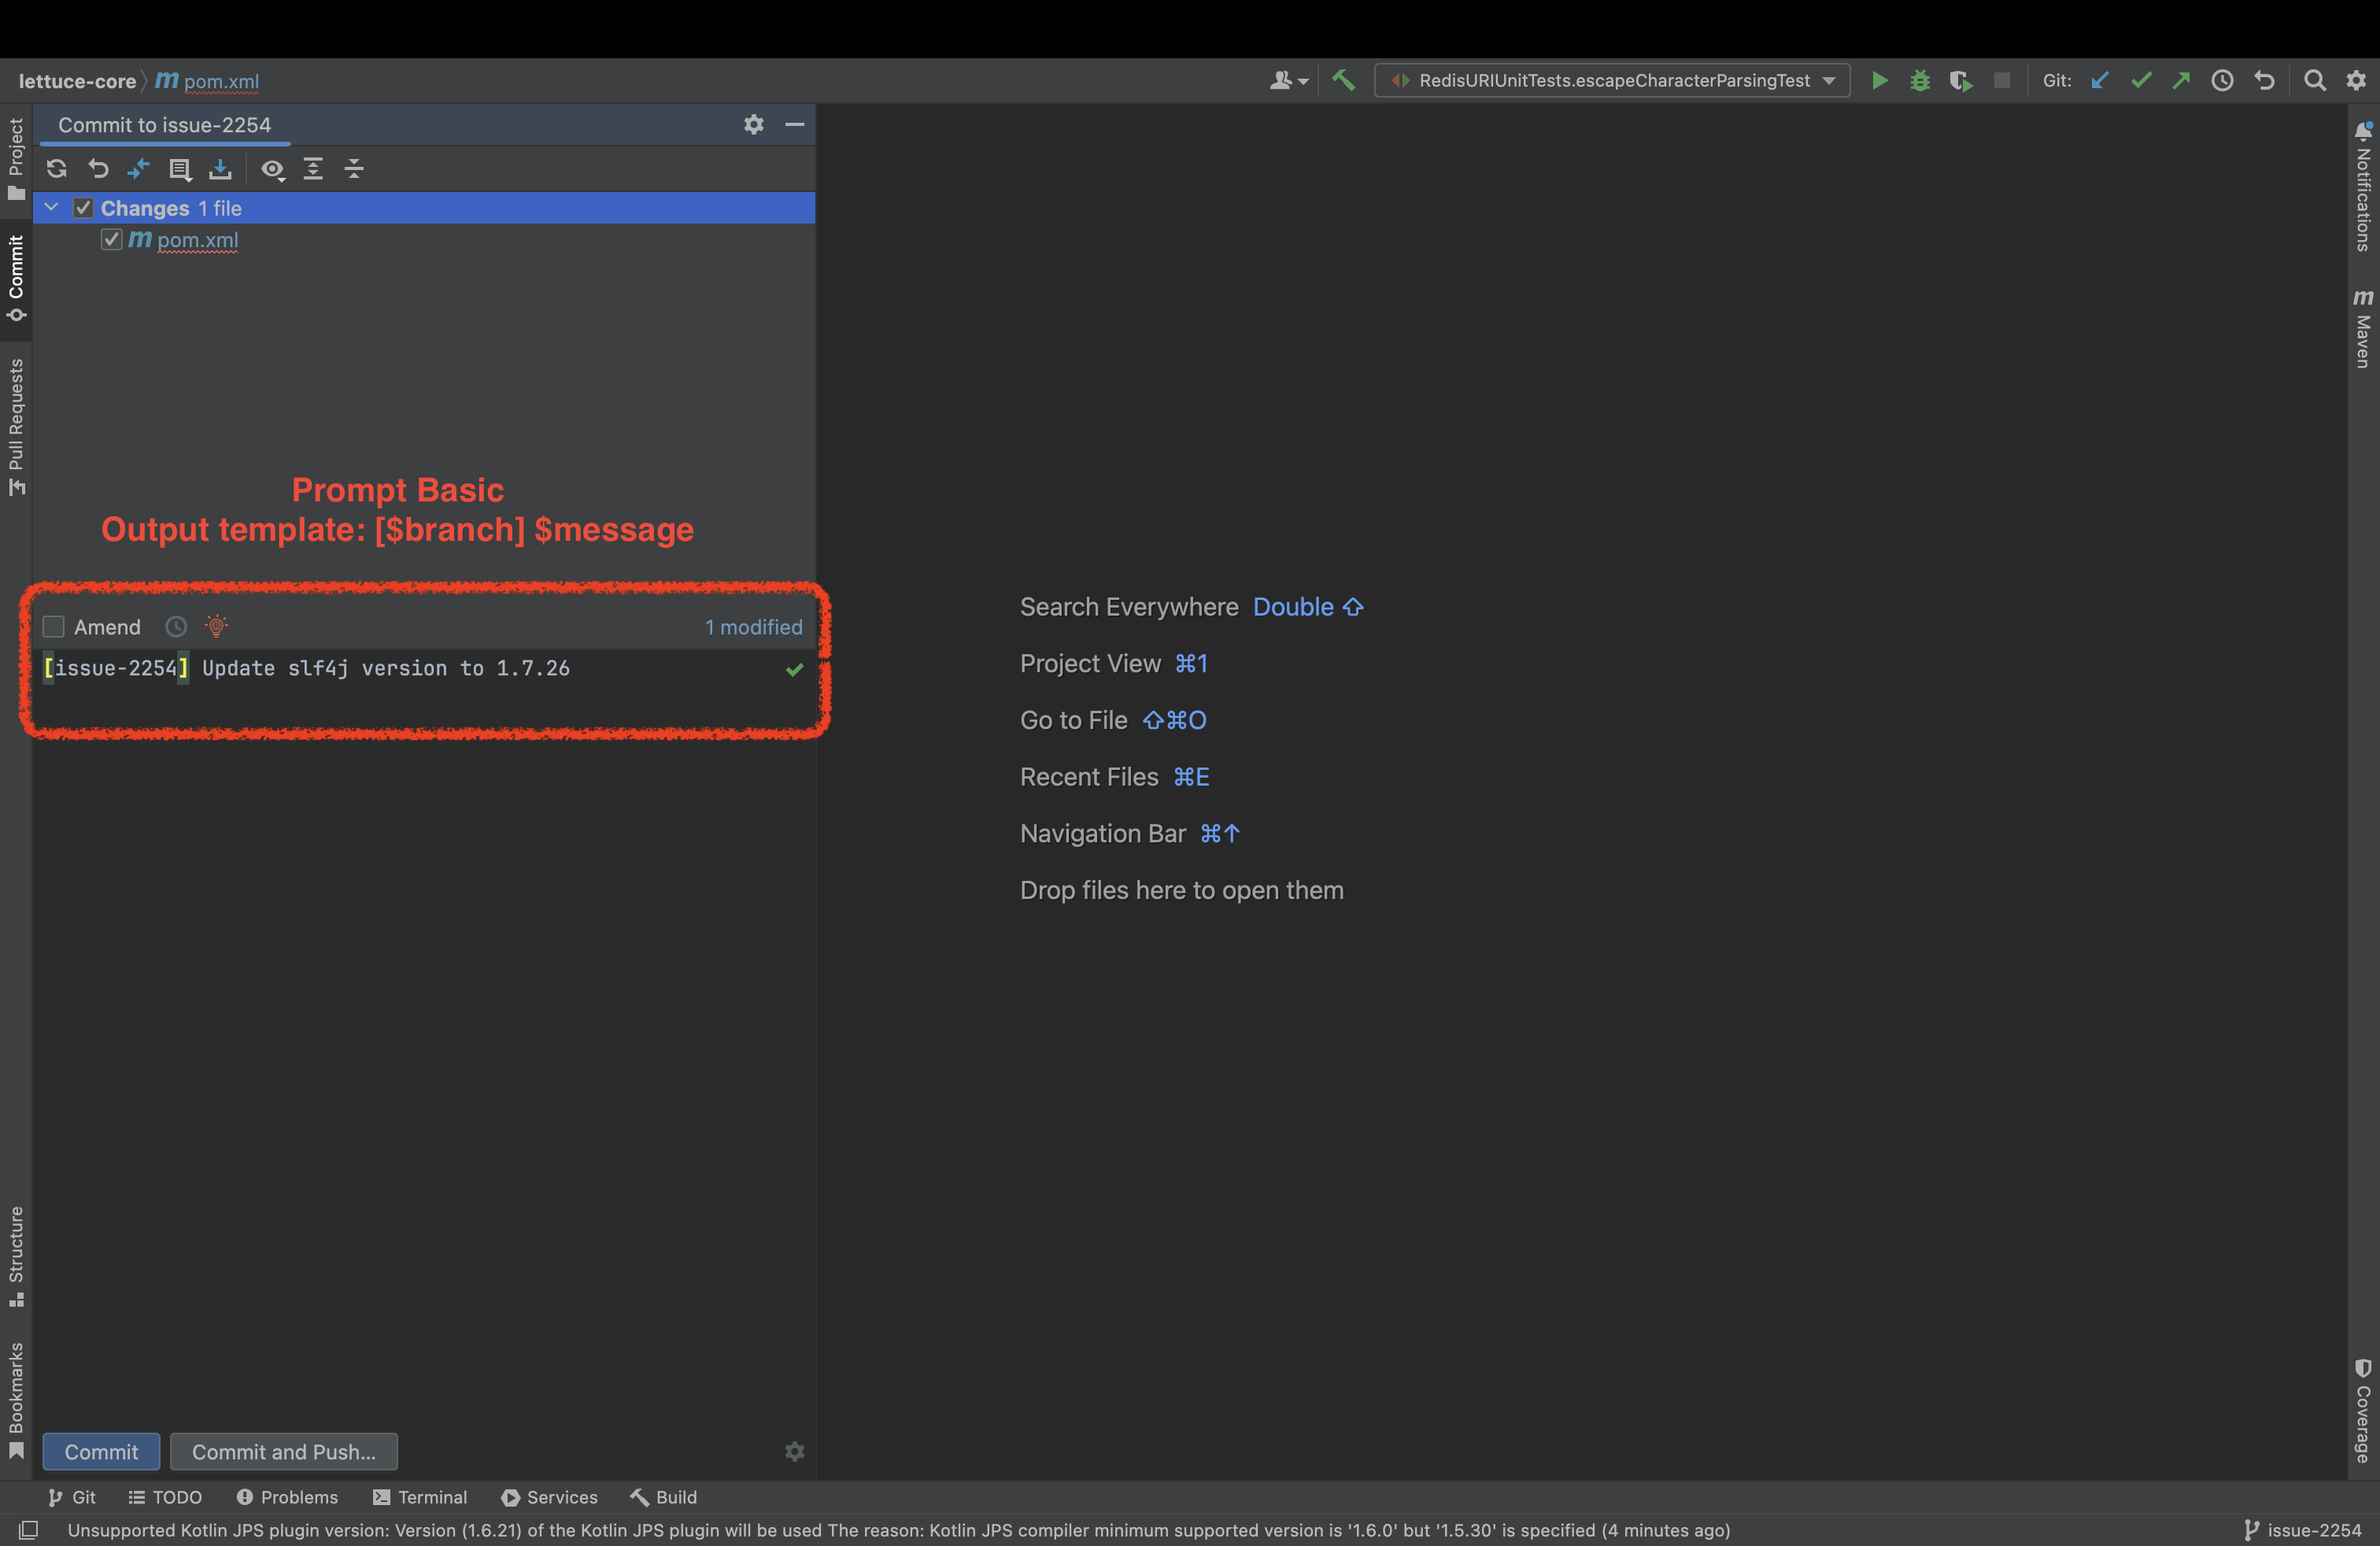
If you enable the Truncate excessive length and Relegate excess to body options, the generated commit message will be automatically truncated and any excess information will be placed in the body.

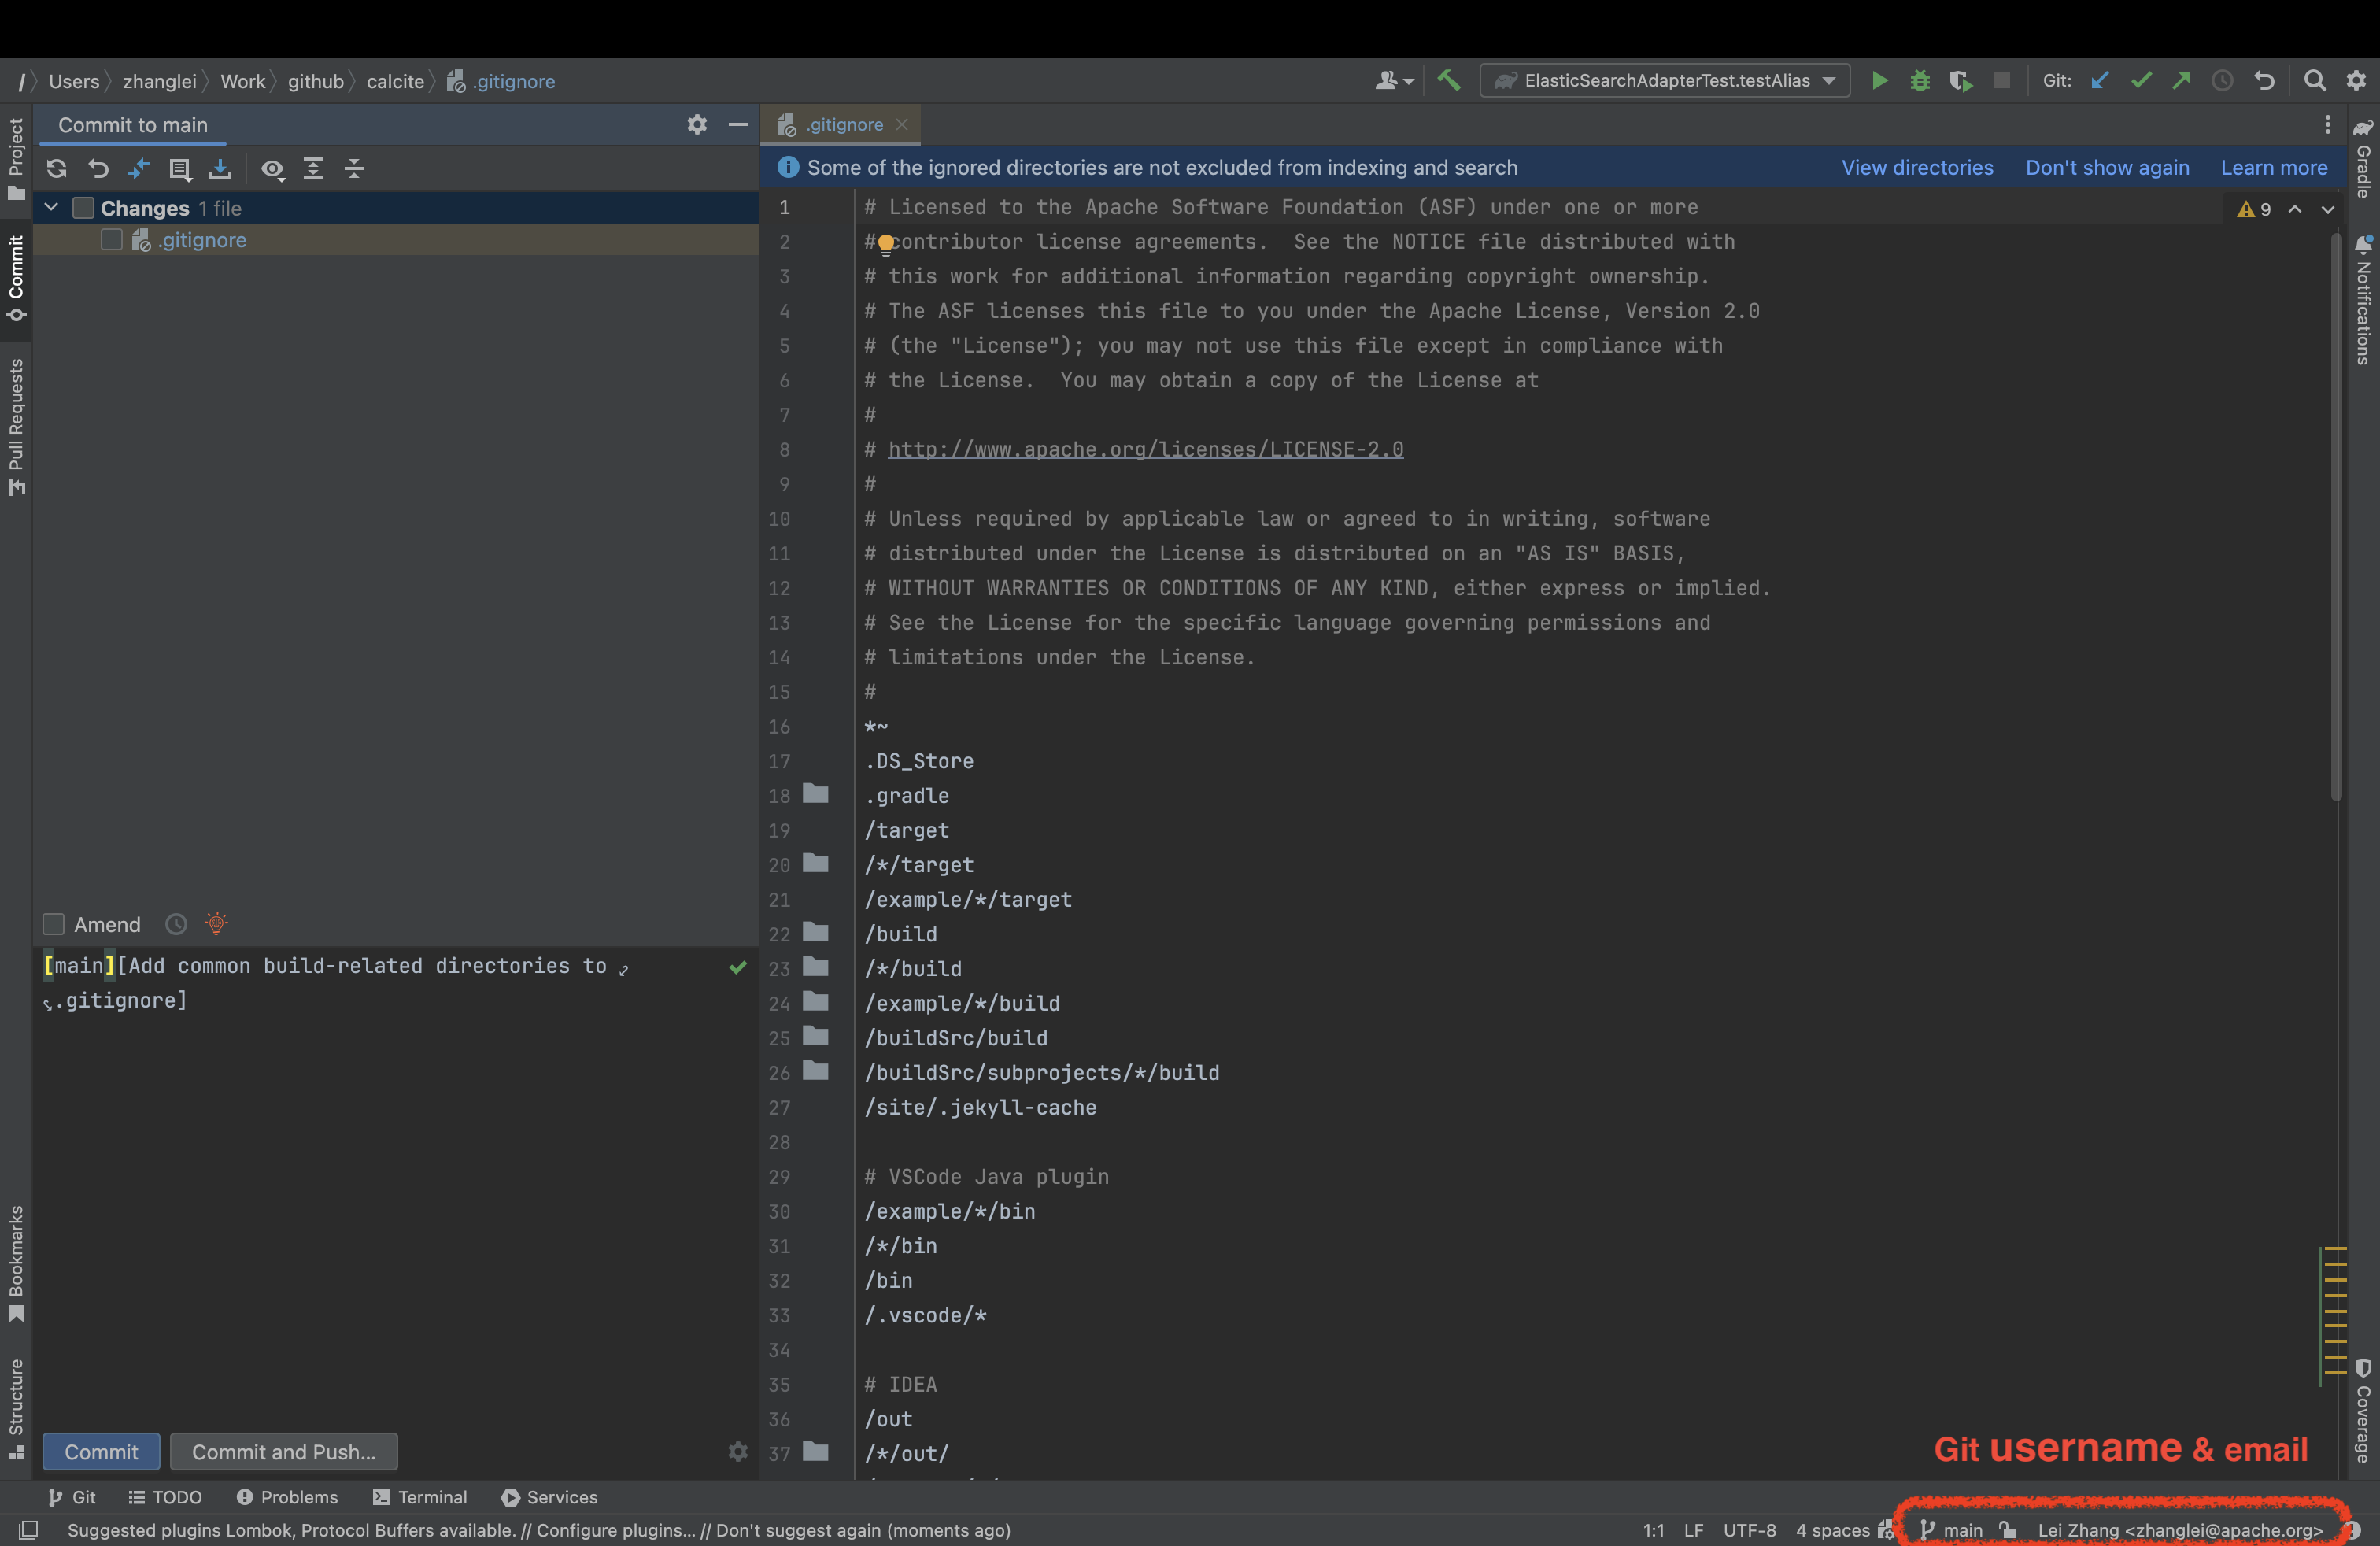
Display of Current Committer Information
You can easily see the current repository’s committer information on the bottom-right corner of the status bar. This information will help you avoid setting incorrect committer information, especially when switching between multiple repositories.
Conclusion
You can visit the JetBrains Marketplace to view detailed information about the Git Assistant plugin and leave your valuable feedback.

