
JProfiler with Docker Sonatype Nexus3
使用 JProfiler 监控 Docker Sonatype Nexus3
下载 JProfiler
从 https://www.ej-technologies.com/下载 JProfiler 和 Agent(注意版本必须一致)
JProfiler GUI
https://download-gcdn.ej-technologies.com/jprofiler/jprofiler_macos_12_0_2.dmg
JProfiler Agent
https://download-gcdn.ej-technologies.com/jprofiler/jprofiler_linux_12_0_2.sh
在服务器上安装 JProfiler Agent
将下载后的 jprofiler_linux_12_0_2.sh 传到服务器上,通过 sh jprofiler_linux_12_0_2.sh 命令按提示安装即可
默认安装路径为 /opt/jprofiler12/,这个路径在启动 Docker 的时候要映射到容器内部
启动 Docker Sonatype Nexus3
在官方 sonatype/nexus3 容器启动参数的基础上做如下修改
使用
-v /opt/jprofiler12:/opt/jprofiler12将 jprofiler 路径映射到容器内部增加
-agentpath:/opt/jprofiler12/bin/linux-x64/libjprofilerti.so=port=9899JVM 参数,设置监听端口为 9899增加
-p 9899:9899容器端口映射
docker run -d \
  -e NEXUS_CONTEXT=nexus \
  -e INSTALL4J_ADD_VM_PARAMS="-Xms10g -Xmx10g \
  -agentpath:/opt/jprofiler12/bin/linux-x64/libjprofilerti.so=port=9899 \
  -XX:MaxDirectMemorySize=15530M \
  -XX:ActiveProcessorCount=16 \
  -XX:+UseParNewGC \
  -XX:ParallelGCThreads=12 \
  -XX:MaxTenuringThreshold=6 \
  -XX:SurvivorRatio=5 \
  -XX:+UseConcMarkSweepGC \
  -XX:-CMSParallelRemarkEnabled \
  -XX:CMSInitiatingOccupancyFraction=65 \
  -XX:+UseCMSInitiatingOccupancyOnly \
  -XX:+UseCMSCompactAtFullCollection \
  -XX:+CMSClassUnloadingEnabled \
  -XX:+DisableExplicitGC \
  -XX:+PrintGCDetails \
  -Xloggc:/nexus-data/vgc/nexus-$(date +%s).vgc" \
  --ulimit nofile=65536:65536 \
  -p 8081:8081 \
  -p 9899:9899 \
  --restart=always \
  --name nexus3 \
  --privileged \
  -v /data/nexus/nexus-data:/nexus-data \
  -v /opt/jprofiler12:/opt/jprofiler12 \
  sonatype/nexus3
打开 JProfiler GUI 连接
点击 Start Center 选择 New Session.
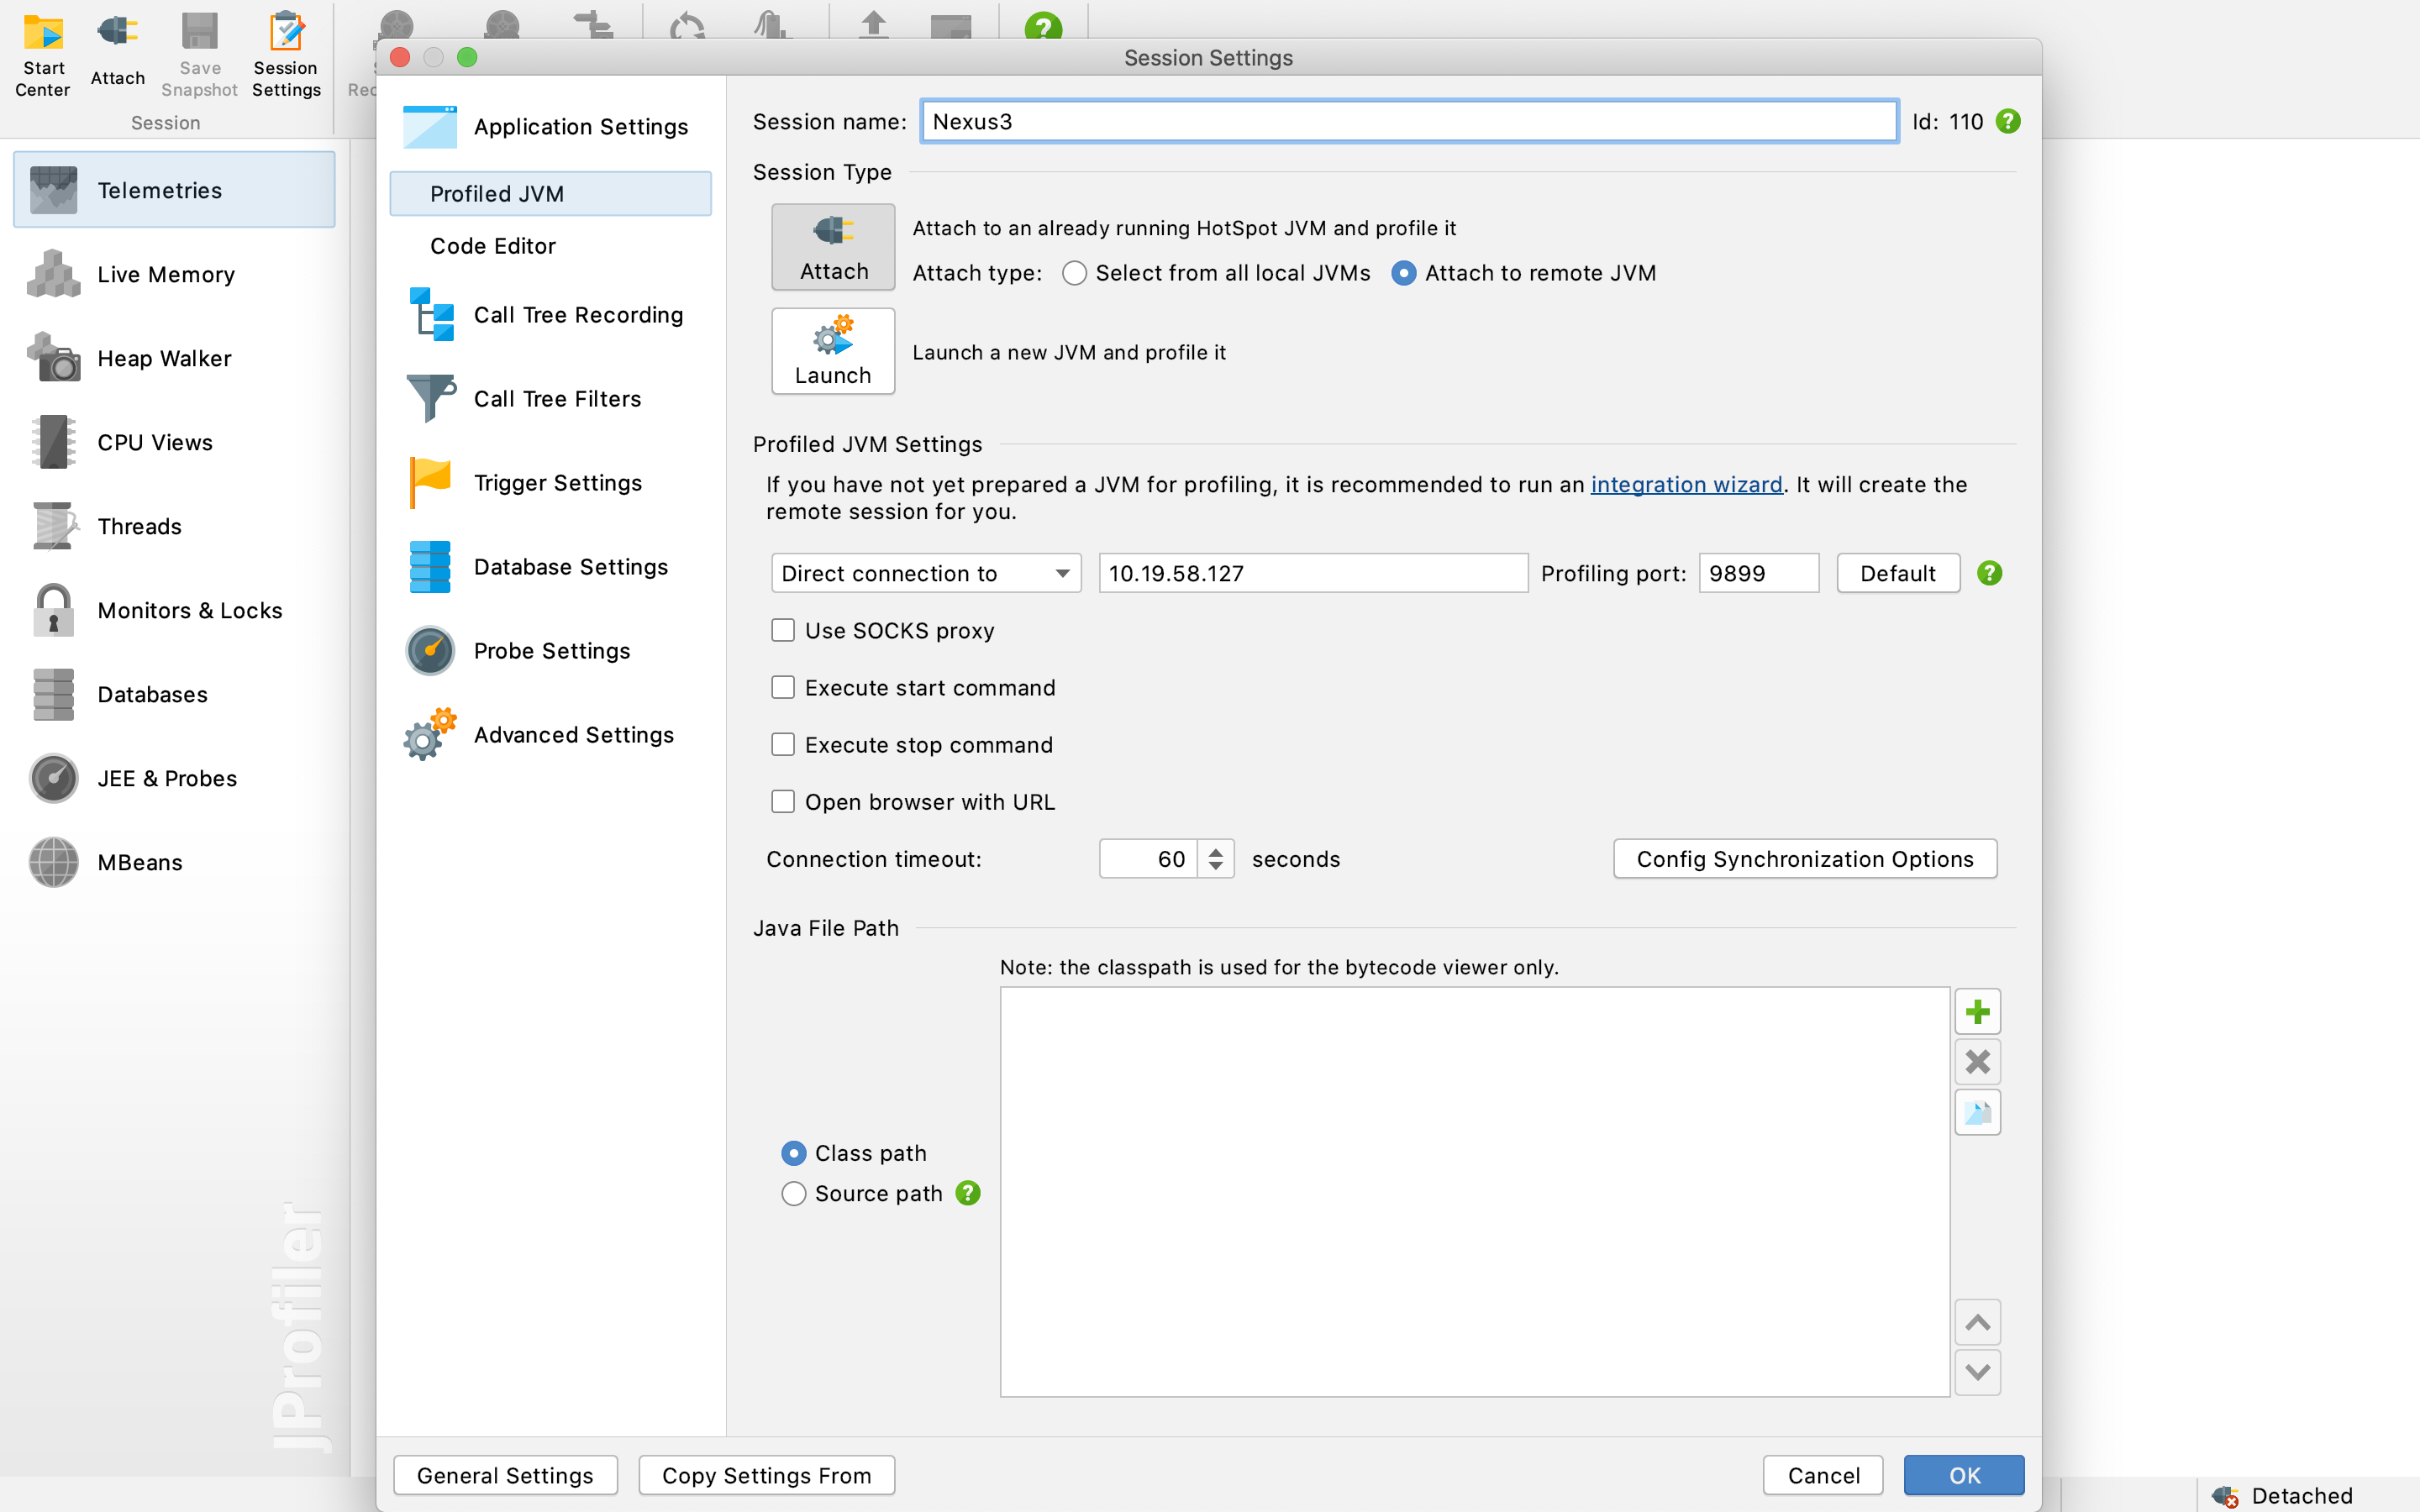
- Session Name: 输入一个合适的名字 Nexus3
- Attach: 选择 Attach to remote JVM
- Profiled JVM Settings: IP 地址输入容器宿主机地址,端口输入 9899
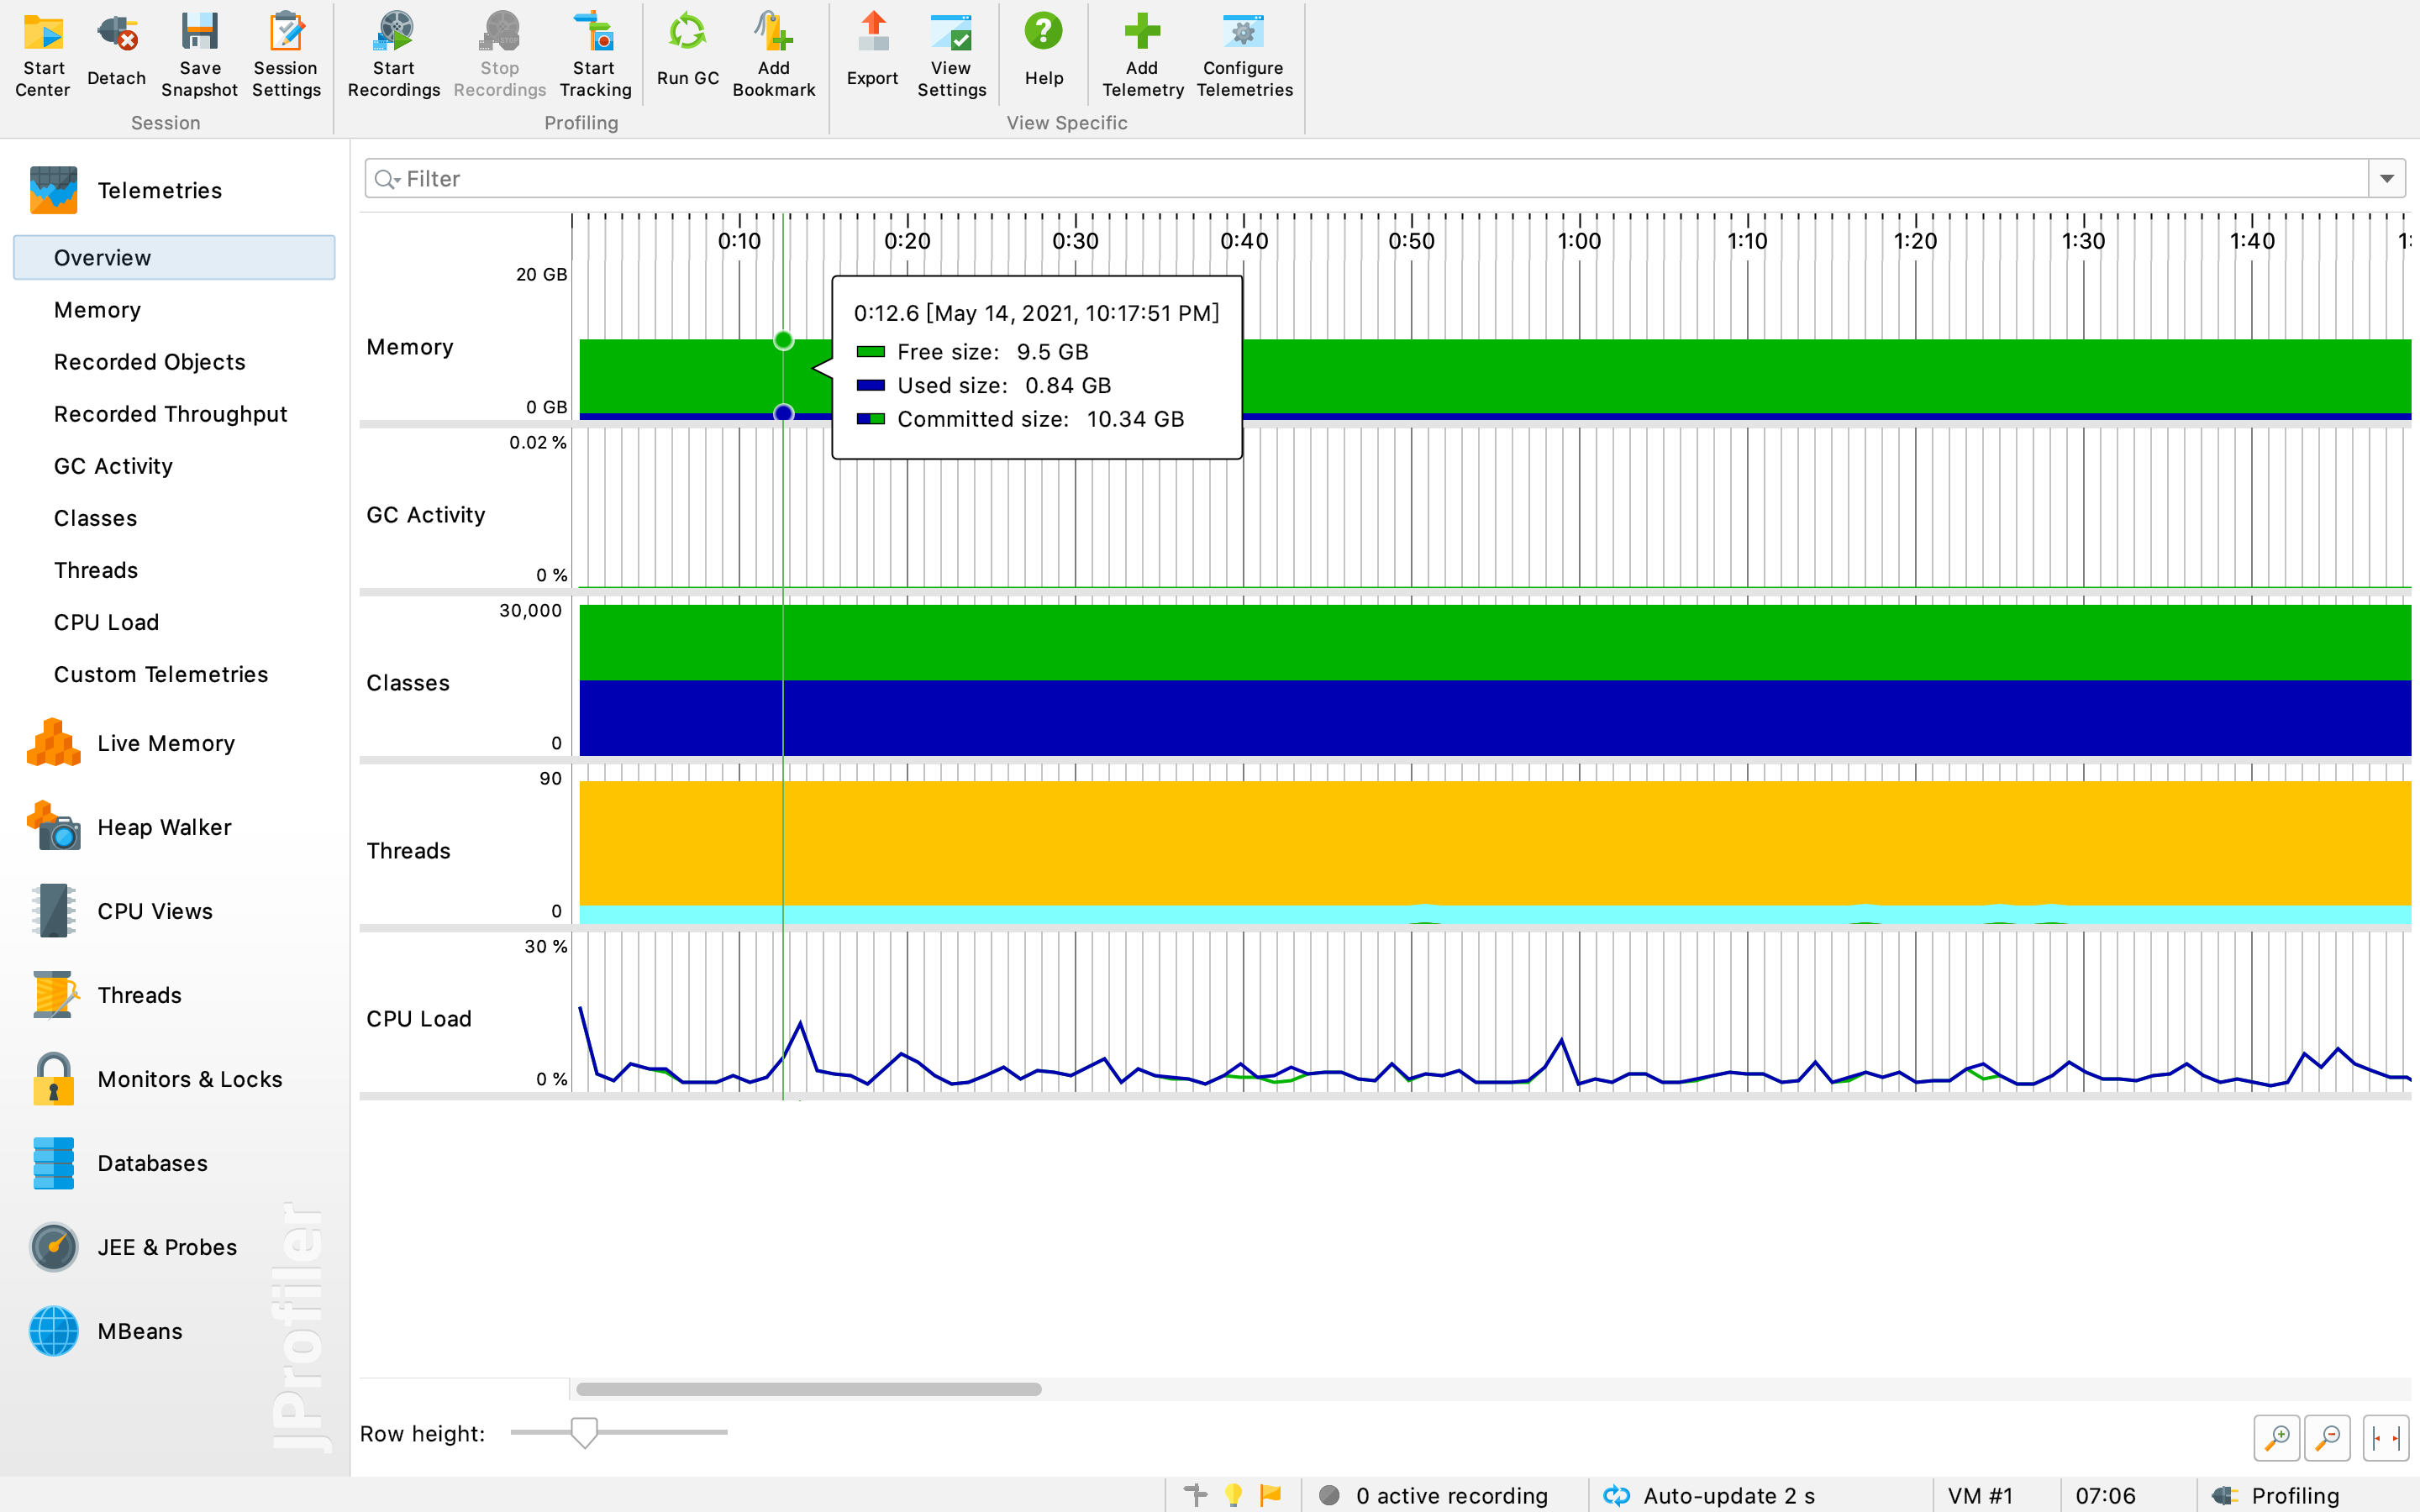
- 点击 OK 后,可以看到如下监控界面