

APISIX Study Notes (4) Plugins Proxy Rewrite
在 APISIX STUDY NOTES (2) PLUGINS TRAFFIC SPLIT 提到,我们可以通过这个插件实现上游服务的导流,但是这个插件只能通过自定义 URL参数 或者 REQUEST HEADER 的方式传递导流变量。如果我们想通过 URL PATH 的方式实现上游业务的到导流,可以使用 Proxy Rewrite 插件
场景描述
我有两个 UPSTREAM 服务:
- UPSTREAM 1
$ curl -i -X GET http://192.168.51.234:5005/nc-tools/actuator/health
HTTP/1.1 200 OK
Connection: keep-alive
Transfer-Encoding: chunked
Content-Type: application/vnd.spring-boot.actuator.v3+json
Date: Sat, 22 May 2021 09:09:29 GMT

{"status":"UP","components":{...}}
- UPSTREAM 2
$ curl -i -X GET http://10.19.88.60:5005/nc-tools/actuator/health
HTTP/1.1 200 OK
Connection: keep-alive
Transfer-Encoding: chunked
Content-Type: application/vnd.spring-boot.actuator.v3+json
Date: Sat, 22 May 2021 09:08:12 GMT

{"status":"UP","components":{...}}
我希望通过 APISIX 将请求路由到两个不同的 UPSTREAM 服务上,参考插件 proxy-rewrite 的样例,可以实现此功能
配置路由 & proxy-rewrite
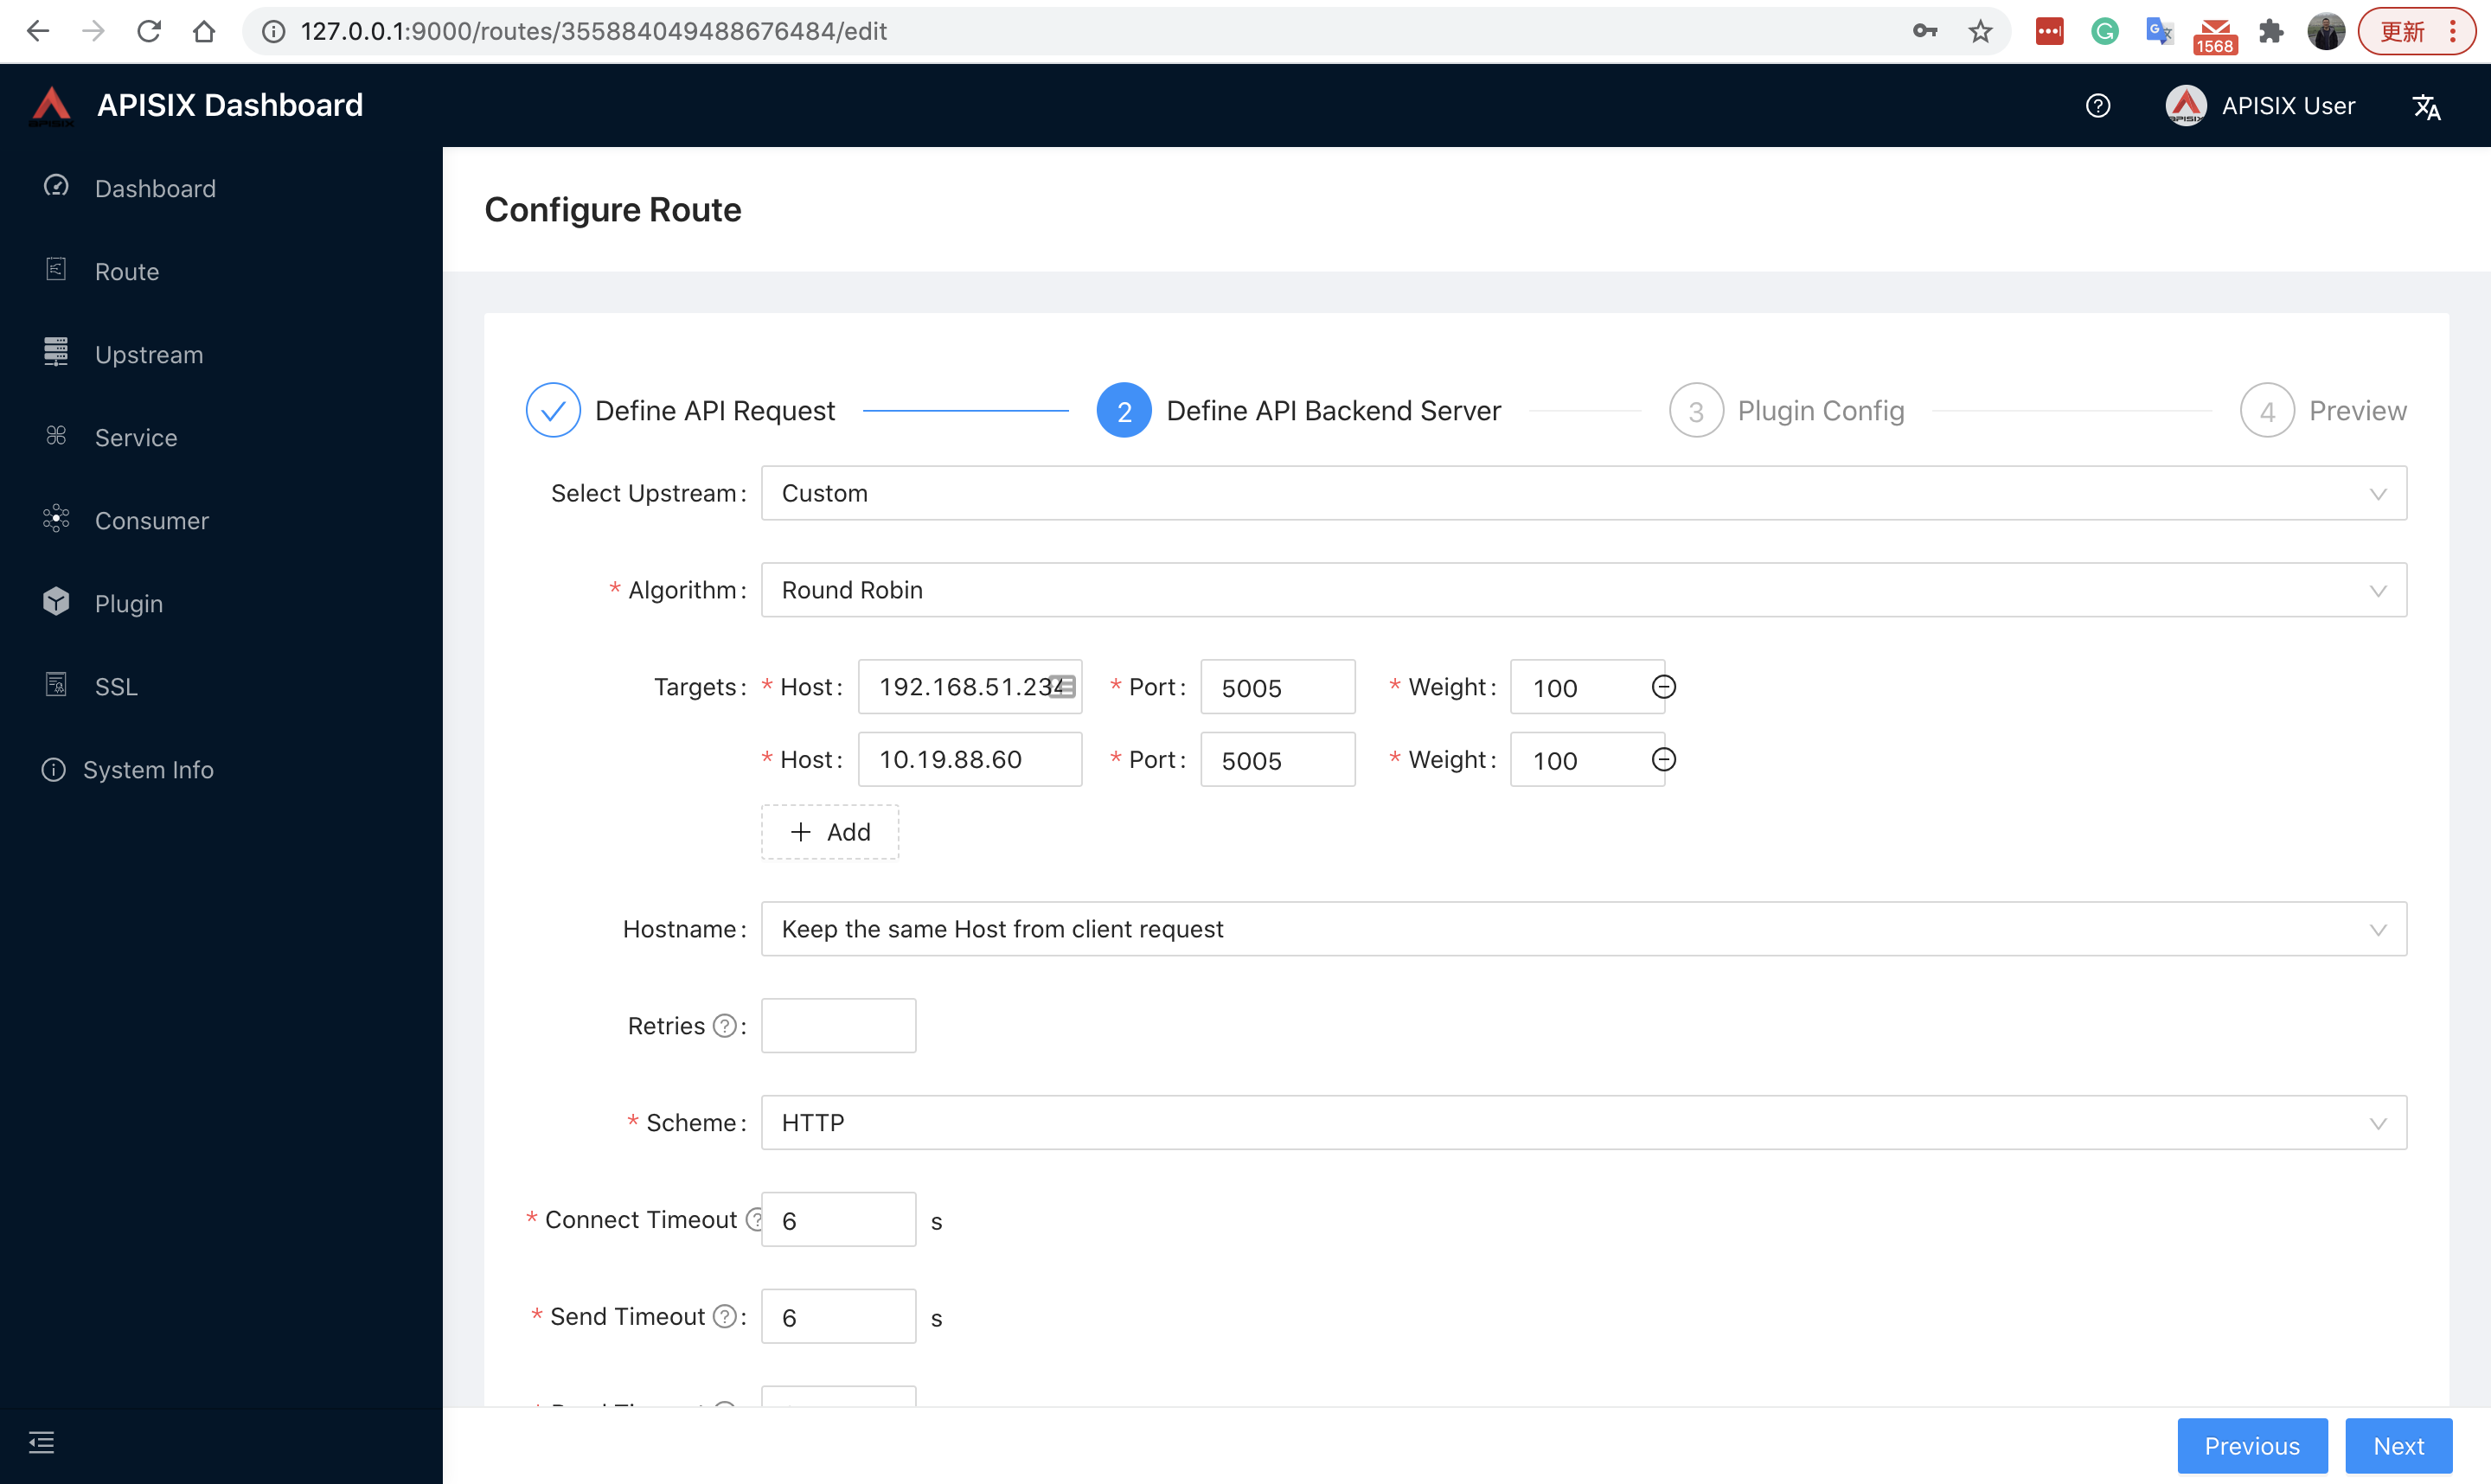
本例中我们要为每个 UPSTREAM 定义一个 ROUTE,并在每个 ROUTE 中使用 proxy-rewrite 插件实现路由到 UPSTREAM
在 Targets 中定义两个 UPSTREAM 的 IP 地址很端口
配置 traffic-split 插件,增加两个 RULES,通过在 REQUEST HEADER 中设置变量的方式,是的此插件把流量指向不通的 UPSTREAM
- center=local -> apisix -> 192.168.51.234:5005
- center=cloud -> apisix -> 10.19.88.60:5005
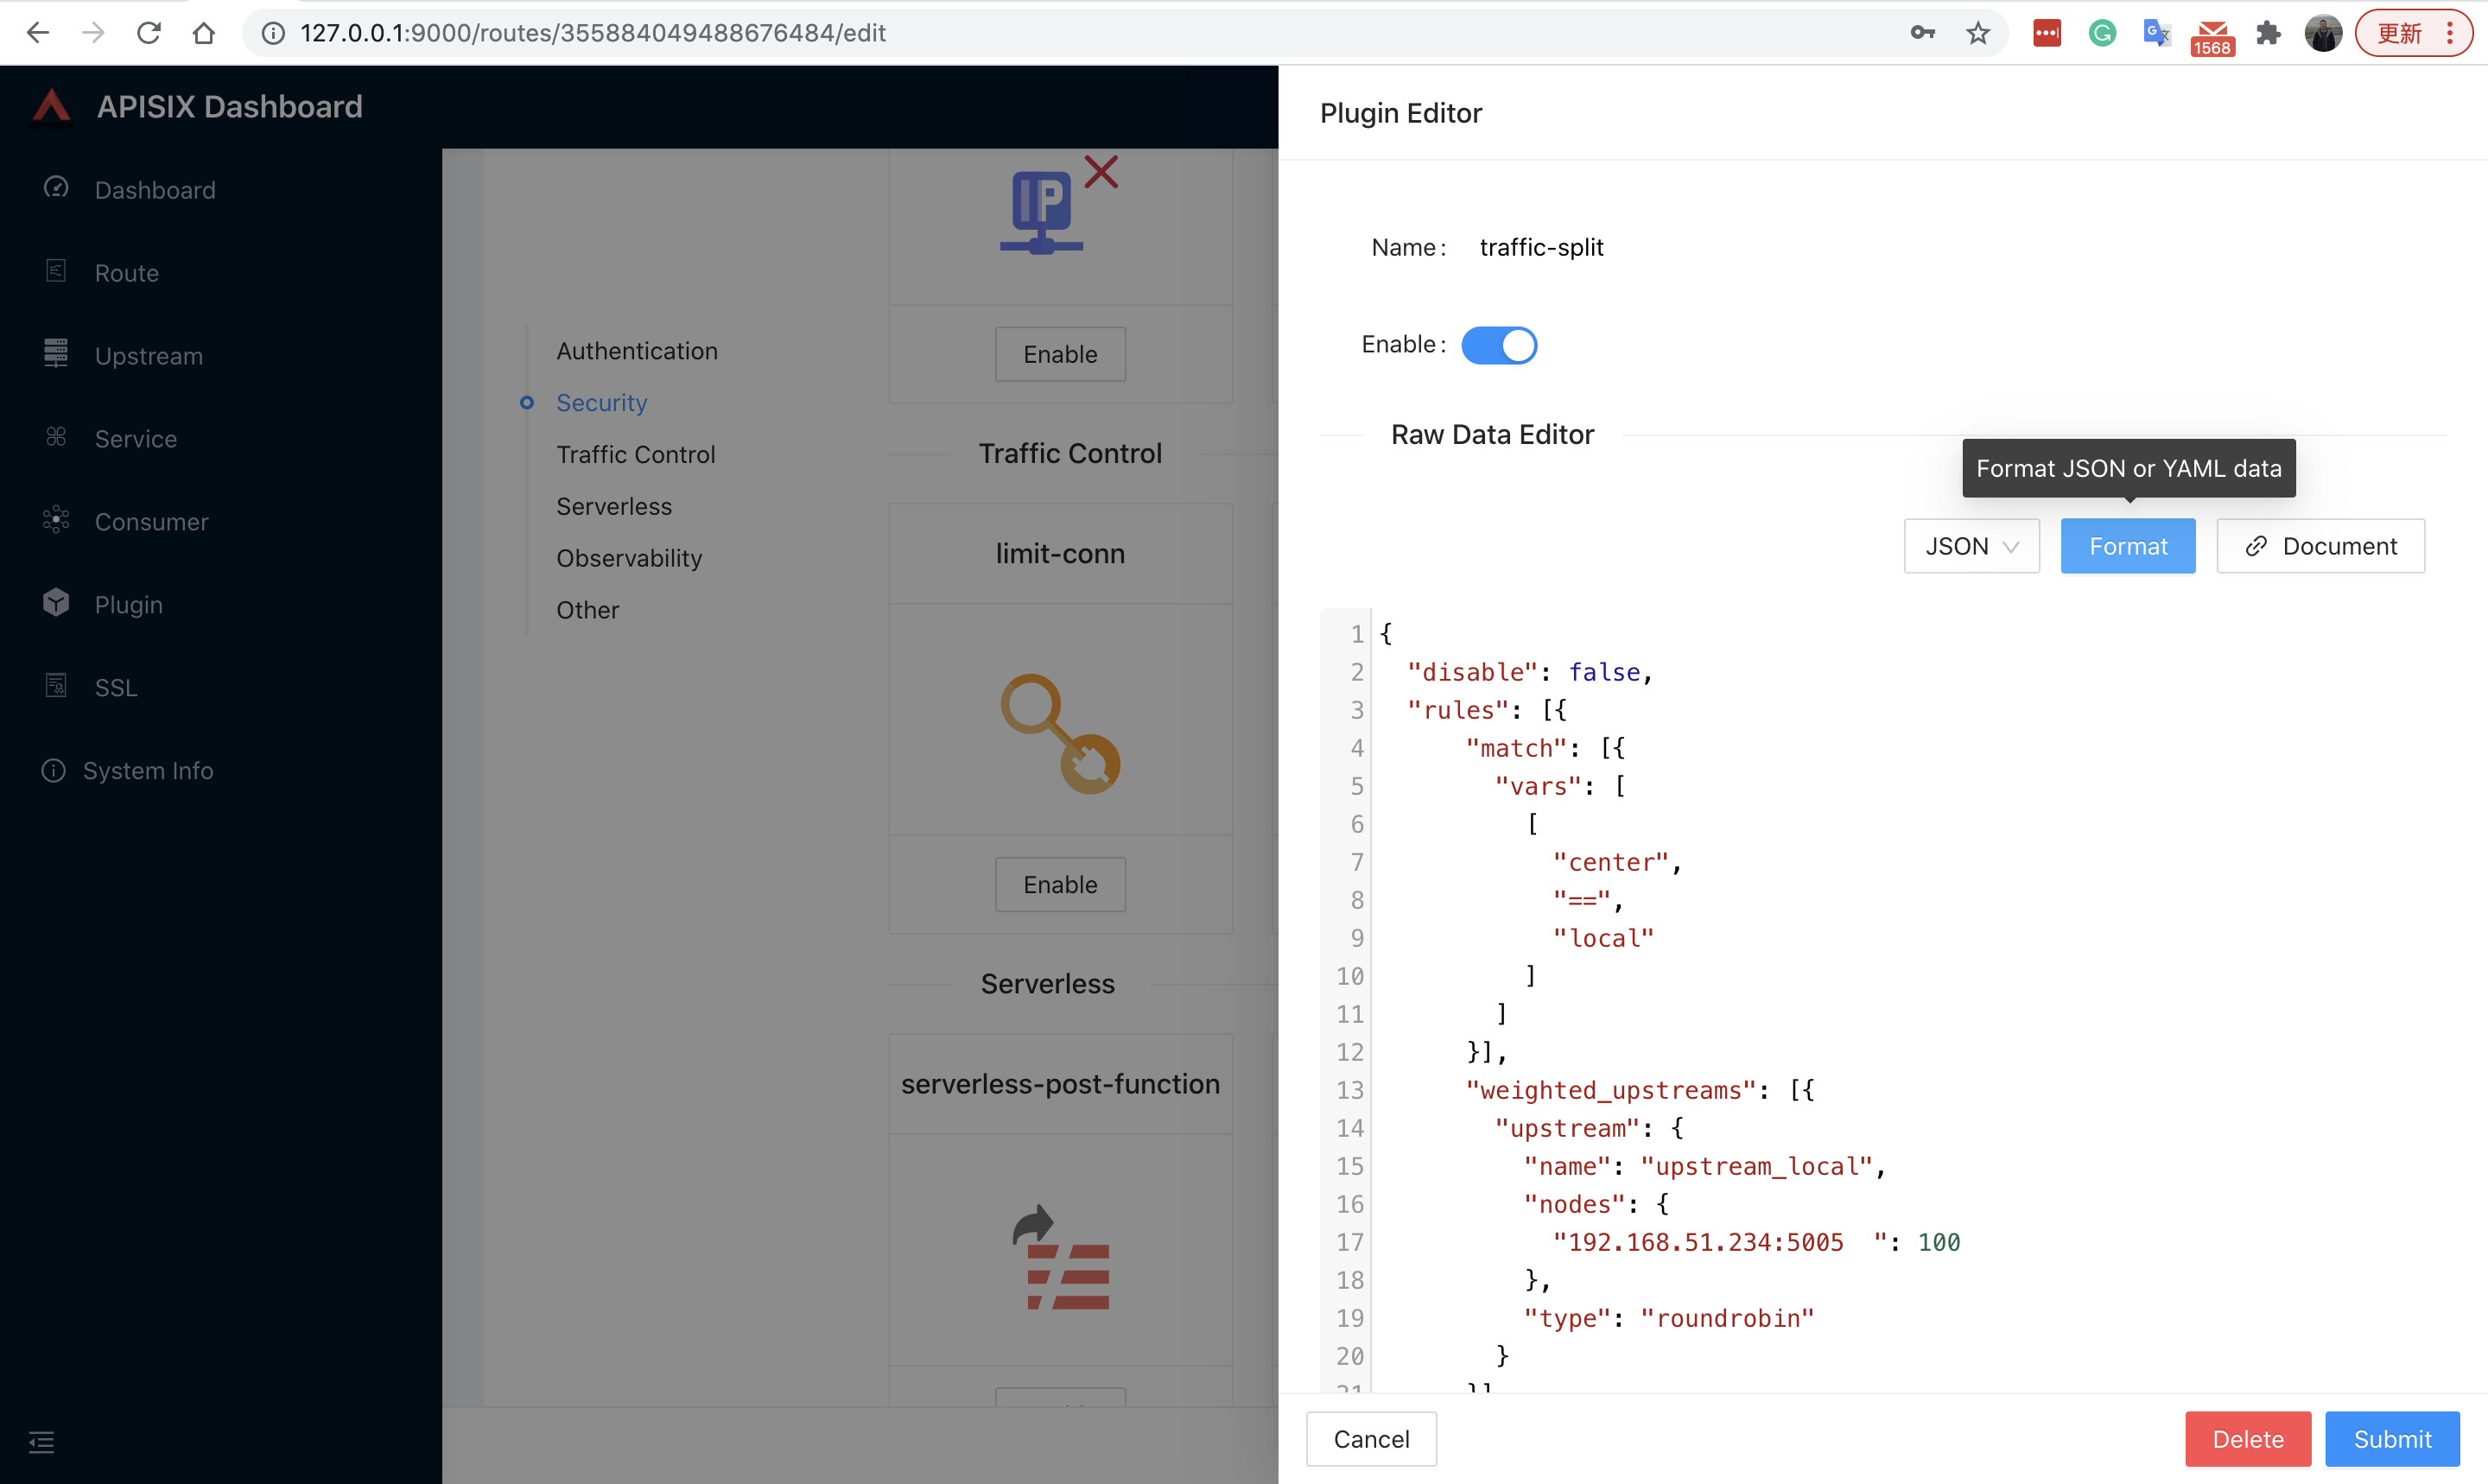
traffic-split JSON 配置如下:
{
  "disable": true,
  "rules": [{
    "match": [{
      "vars": [
        ["center", "==", "local"]
      ]
    }],
    "weighted_upstreams": [{
      "upstream": {
        "name": "upstream_local",
        "nodes": {
          "192.168.51.234:5005": 100
        },
        "type": "roundrobin"
      }
    }]
  },{
    "match": [{
      "vars": [
        ["center", "==", "cloud"]
      ]
    }],
    "weighted_upstreams": [{
      "upstream": {
        "name": "upstream_cloud",
        "nodes": {
          "10.19.88.60:5005": 100
        },
        "type": "roundrobin"
      }
    }]
  }]
}
测试
我可以在请求中设置 -H ‘center:xxx’ 的方式,APISIX 的 Traffic Split 将我的请求引流到匹配的 UPSTREAM
- center=local -> apisix -> 192.168.51.234:5005
$ curl -i -X GET http://127.0.0.1:9080/nc-tools/actuator/health -H 'center:local'
HTTP/1.1 200 OK
Content-Type: application/vnd.spring-boot.actuator.v3+json
Transfer-Encoding: chunked
Connection: keep-alive
Date: Sat, 22 May 2021 09:34:18 GMT
Server: APISIX/2.5

{"status":"UP","components":{...}}
- center=cloud -> apisix -> 10.19.88.60:5005
$ curl -i -X GET http://127.0.0.1:9080/nc-tools/actuator/health -H 'center:cloud'
HTTP/1.1 200 OK
Content-Type: application/vnd.spring-boot.actuator.v3+json
Transfer-Encoding: chunked
Connection: keep-alive
Date: Sat, 22 May 2021 09:36:31 GMT
Server: APISIX/2.5

{"status":"UP","components":{...}}
在 APISIX 的日志文件 /apisix/logs/access.log 中可以看到已经正确转发
127.0.0.1 - - [22/May/2021:17:50:13 +0800] 127.0.0.1:9080 "GET /nc-tools/actuator/health HTTP/1.1" 200 538 0.060 "-" "curl/7.65.2" 10.19.88.60:5005 200 0.060 "http://127.0.0.1:9080"
127.0.0.1 - - [22/May/2021:17:50:25 +0800] 127.0.0.1:9080 "GET /nc-tools/actuator/health HTTP/1.1" 200 2363 0.018 "-" "curl/7.65.2" 192.168.51.234:5005 200 0.018 "http://127.0.0.1:9080"
提示:也可以通过URL参数的方式传递变量
$ curl -i -X GET http://127.0.0.1:9080/nc-tools/actuator/health?center=local
$ curl -i -X GET http://127.0.0.1:9080/nc-tools/actuator/health?center=cloud
It’s COOL!!